Wednesday, October 30, 2019

Halloween Card with Pop-up feature inside

Hello and I hope you are well. Today I am going to share my last Halloween cards of the year.  These both have similar card fronts, but for the blue card, I decided to use the W-Fold on the inside so I could add a lot more images!  (I shared a tutorial on how to do this HERE.)


Stampendous, Just for Fun and Hero Arts stamps.

I would love to enter this in the SimonSaysStamp Wednesday Anything Goes challenge and Lost Coast Portal To Creativity’s Halloween Challenge.

I am all ready with piles of candy to give out tomorrow night.  Unfortunately, we are supposed to get a lot of rain, so I hope I don’t have a lot leftover.  Handing out candy is something I look forward to every year.  We typically get LOTS of trick-or-treaters, as we have a very safe road, and I have found that most kids are very polite and trying their best, for their ages.  That being said, the tiny ones will probably always be my favorites!

Have a wonderful day!


Tuesday, October 29, 2019

Pinned It? Try It! Week 8: One-Sheet Wonder

Hello and Happy Tuesday!  I have missed the timing for some of my Pinned It? Try It! Series, but since it is a self-imposed challenge, I feel liberated in doing it on which day I can!

Lucky for me, in my online cardmaking group, one of the challenges was to use a particular 6x6 One Sheet Wonder layout.  This was one I have already pinned. This makes 4 cards, although for the challenge we only had to complete 3.  The basic layouts were easy, but figuring out the focal points took quite a while. I was happy to bring out some stamp sets I hadn’t used in a while.

My one sheet is the sweet brown foliage paper.  It is from an older Love Nicole 6x6 paper pad that I got a AC Moore a while back and really haven’t used as much as I should.  

I also added accents of this very pretty champagne/gold metallic cardstock that I got on clearance at Staples.  It really doesn’t show how pretty it is in the photos.  


Supplies: Gina K Designs Painted Autumn and Birthday Blessings Stamp/Die sets, Close to My Heart Just Treats stamp set, Gina Marie Wonky Stitched Ovals and Stitched tag dies, Love Nicole Autumn Splendor 6x6 paper pad, EK Success Postage edge punch, Astrobrights Gold Pearl Linen cardstock, other items from my stash.

I’d love to enter these in the Cupcake Inspirations Fall Challenge and the ModSquad’s Sentiment says it All challenge.

.

Thank you for stopping in today!  How have you been spending your crafty time lately?  

Monday, October 28, 2019

Spider Halloween Card

Hello everyone! Hope you had a good weekend!  One of my kids has a fever today, so we won’t be able to enjoy the beautiful sunshine as much as we hoped.  

Here is a quick share of another Halloween cards I made.  The spiders are stickers I purchased last year. Now, I have just one left.


Thanks for visiting! Have a good day!

Friday, October 25, 2019

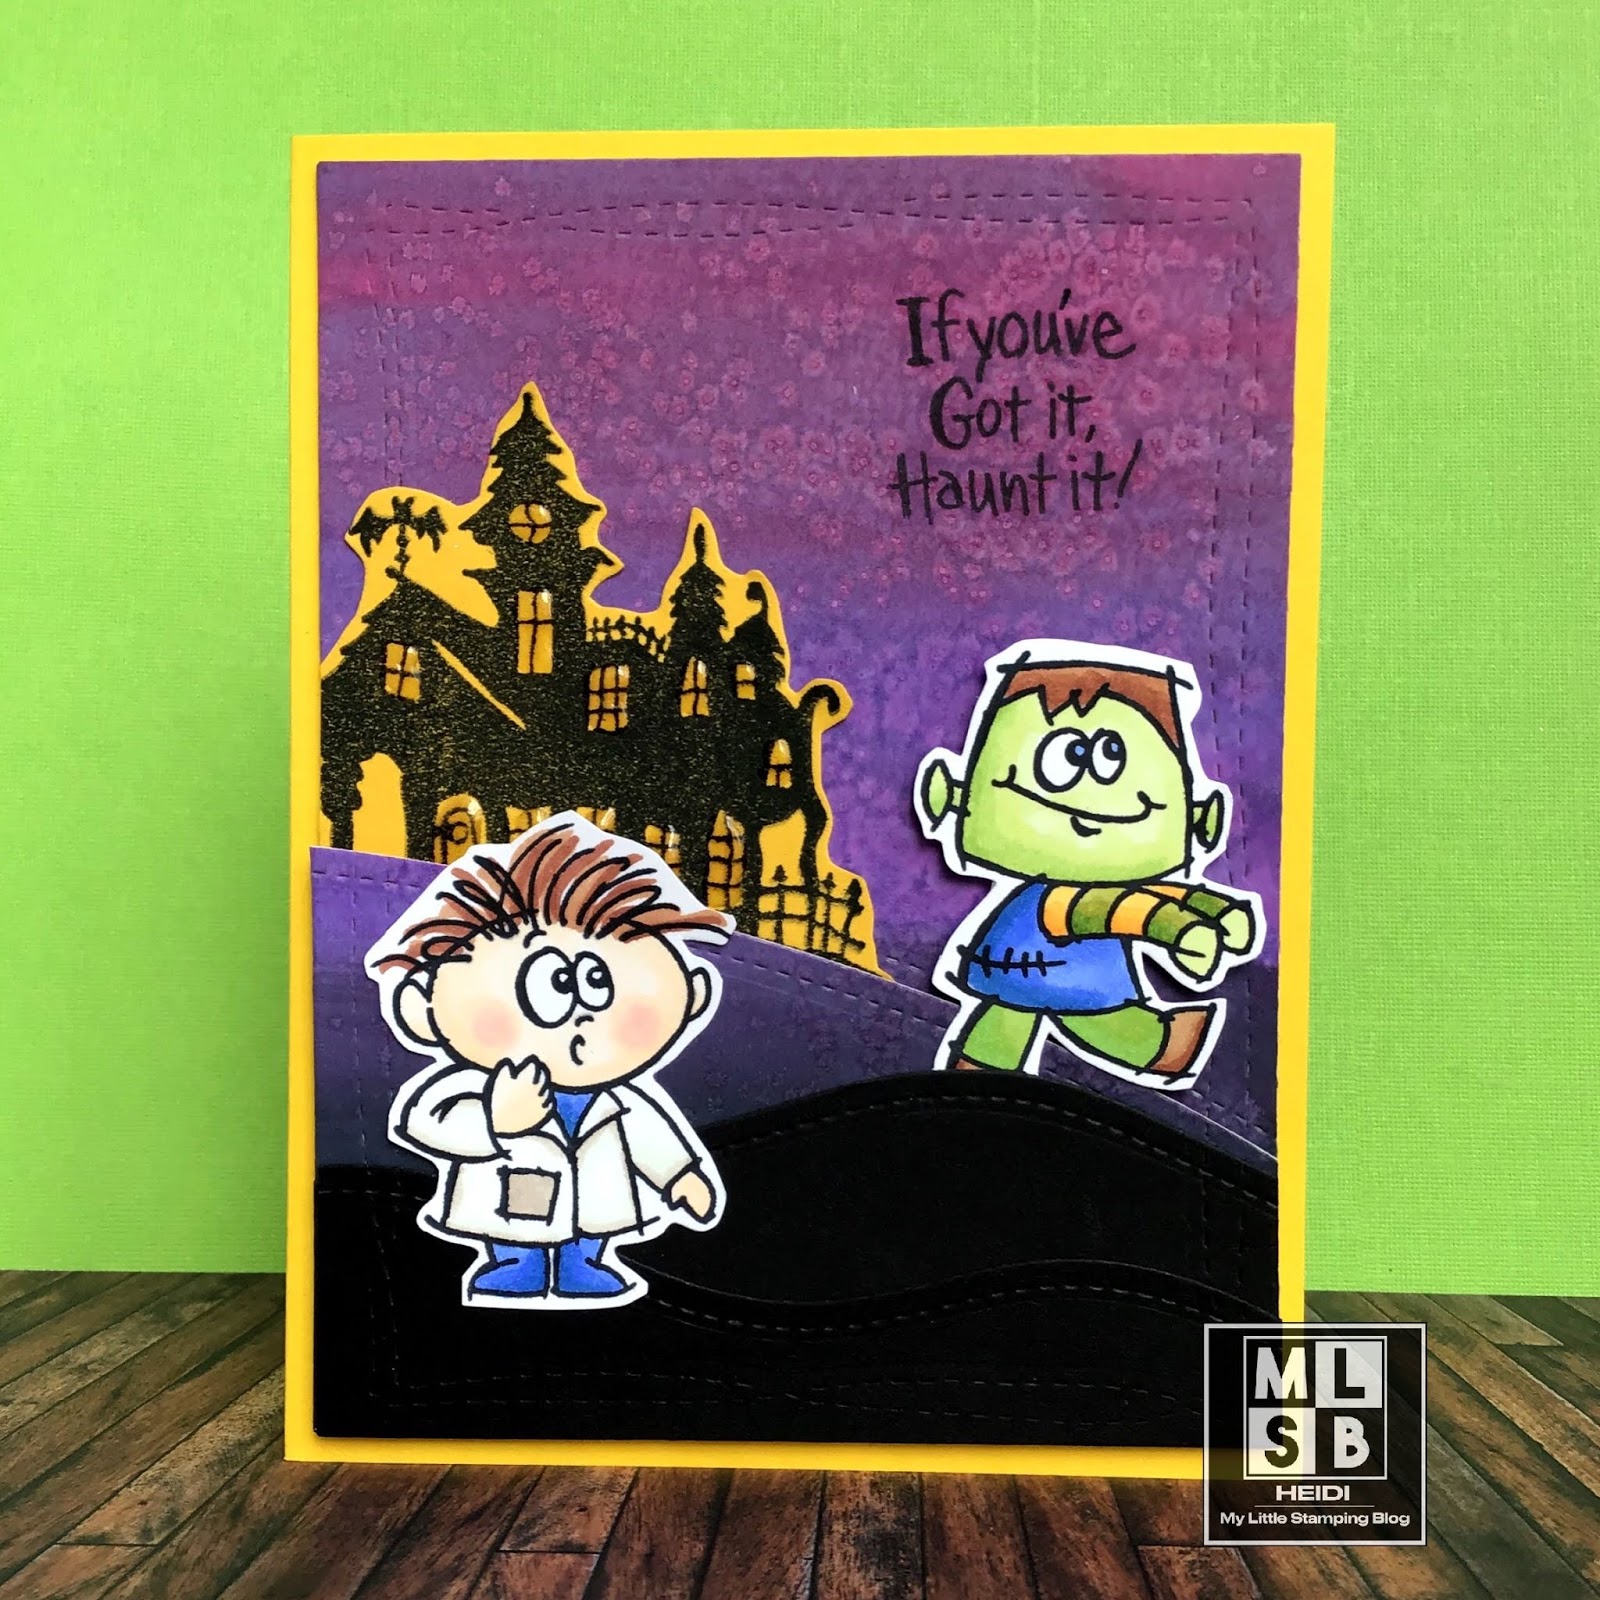
Not too scary Halloween Cards - Distress Oxides

Hello everyone!  Most of the Halloween cards that I am going to share in the next few days were made using a combo of my time spent at my craft group, plus time spent at home.  I have found that traveling with my supplies is best used by making “pieces-parts” of cards.  

So, one week at craft group, I brought my Distress and Distress Oxide inks, and made a bunch of backgrounds.  I added ink with direct-to-paper techniques, and then added some water to blend them, and sometimes added salt to get texture.  

Another week, I brought stamp sets and just stamped out a bunch of images, colored them, and fussy cut them out.  I actually have a bunch of Christmas images done that I need to make into cards, too.  

Then I take them home, and I find it easier to put cards together there, where I have all my craft supplies at my fingertips.  Then I am able to make a variety of cards.

The first Halloween card, I stamped a creepy tree in the background, added black ink around the edge and then just added my cute costumed kids.  I really like this combo of creepy images and cute.  I don’t like too scary of cards for Halloween.


The second card, I went with a lot more detail.  I not only used my salt-treated oxide background, but I die cut and popped up some hills, stamped a haunted house on yellow and added glossy accents to the window.  I really love how this one turned out, and I hope the photo does it justice!


Supplies: Stampendous Bring to Life stamps set, Hero Arts CL057 October set, Just for Fun Rubber Stamps Haunted House and Tree, Distress Oxide ink and Versafine ink in black, Distress Oxide (card 1) Twisted Citron, Lucky Clover, Salty Ocean, (card 2) Seedless Preserves, Wilted Violet, Black soot,  Avery Elle Wonky Stitched Rectangles dies, Frantic Stamper stitched borders dies, other items from my stash.

I would love to enter the SimonSaysStamp’s Monday Challenge Spooky, and Lost Coast Portal to Creativity’s Halloween Challenge.

THANK YOU for your visit today!  Hope to see you again soon!

Wednesday, October 23, 2019

Pretty Floral Thank You

Hello everyone!  As expected, I did have another busy week!  I am still waiting for my permanent dental crown to be ready, but the temporary one doesn’t feel too bad anymore.  The kids have been busy as ever, and I have been like a professional chauffeur!  Well, maybe not!

I did have some time to make a couple cards yesterday, and plan to work on some more today.  So I will be sharing again soon, instead of leaving a week go by without posting anything new. I know I won’t be able to read every post I missed, but I will be making an effort!

Today’s card was designed using flowers from a couple different stamp sets.  

I first stamped the silhouette flower by inking it up with two colors of blue ink.  I do not have any fancy ombré ink pads, so this is an easy way to get a similar look.  I cut this into a tag and edged it with green ink.


For my embellishment, I stamped an outline flower onto some scrap teal cardstock and I cut it out. I used glitter glue on the center.  Then I placed this over a bow on my card to create a hand done embellishment.  


Supplies: I Brake for Stamps Half Sheet 138BFlorals Sheet (Save 10% on your order using my code SAVE10HEIDI) Hero Arts Cornflower and Soft Pool inks, Gina K Applemint Ink, Versafine Black Ink, Recollections Backyard Table 6x6 paper pad, Frantic Stamper edge dies, other items from my stash.

As always, I thank you all for visiting and commenting.  It really does brighten one’s spirits and encourage me to make more cards!  I hope you are having a good day!

Wednesday, October 16, 2019

Little Creature’s Christmas Tree

Hello friends!  I have been absent from blogging quite a bit this past week.  It is mostly the normal fall busy-ness, but also my son was ill and I had to have some dental work done.  Unfortunately, I can see that there is still going to be a lot of activities in the next week.  But, today is a rainy, dull day, and I think I can get more cards made today. 

The first card I made was this Christmas card!

I colored the stamp with alcohol markers.  I started with all the details in the Christmas tree. There are carrots, grapes, pinecones, and more, decorating this woodland tree!  How cute are all the little animals.  I then added Wink of Stella, glitter glue, white gel pen and glossy accents to the details.  It looks like it would take a long time to color but it really didn’t.  

I masked off the snowy portion of the image, and the edges, and then sponged blue ink for my sky.  It looks like it took a long time to color, but it really didn’t .


I matted the image over some pretty plaid paper, using ribbon and a snowflake button to add even more Christmas cheer!

Supplies: I Brake for Stamps Little Creatures Christmas, Memento Black ink, Spectrum Noir alcohol markers, Nuvo Drops blizzard, Wink of Stella pen, Avery Elle Wonky Stitched Rectangles dies, Heidi Swapp Christmas paper pad, other items from my stash.
(Save 10% off your entire order at I Brake for Stamps with my coupon code SAVE10HEIDI)


Hope you have a wonderful day! I would love to know if you have started your holiday cards yet?

Thursday, October 10, 2019

Home Decor Stamping Project

Hello all!  I have a very different project to share today. I found this Pocket Frame at Tuesday Morning.  It has a magnetic removable top, so you can slide artwork in and out of the frame.  I thought I would make a little stamped piece to display on my stamp desk.  


I started with a sheet of pattern paper that had a few element of a post card on it.  I did some stamping in the background with pool and tan dye inks.  I then stamped onto coordinating patterned papers with the antique tomb fragment and then sculpted bird and fussy cut them.


The one thing I learned with this project is that although I did use foam tape for some elements, it does not look very dimensional in the frame.  The next artwork I do, I will know that I can make it much much more dimensional.  

This was a really fun project!  I will be displaying it for a while, but I am already looking forward to making another one!

Supplies: Tim Holtz Stampers Anonymous Flight of Fancy stamp set, Technique Junkies Tomb Fragment Panel, Gina K Dark Chocolate ink, Hero Arts Soft Sand and Tide Pool inks, My Mind’s Eye Lost and Found Portobello Road 6x6 patterned paper pad

Thanks for visiting today!