Showing posts with label distress ink. Show all posts

Saturday, April 8, 2023

Spring Bunny Card

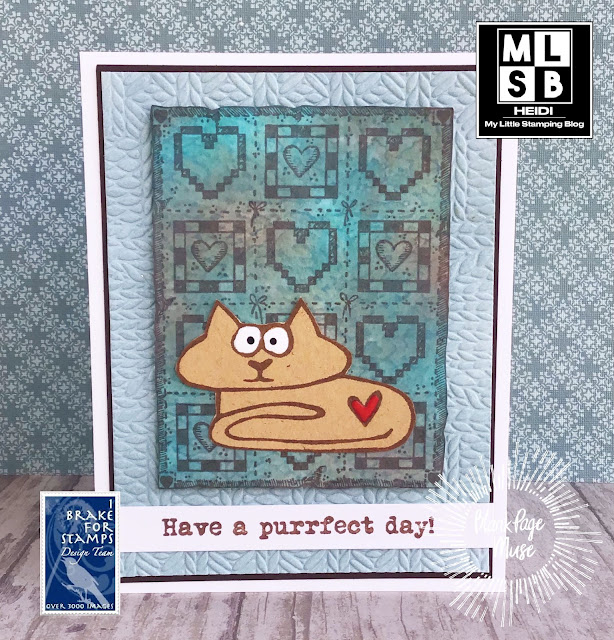
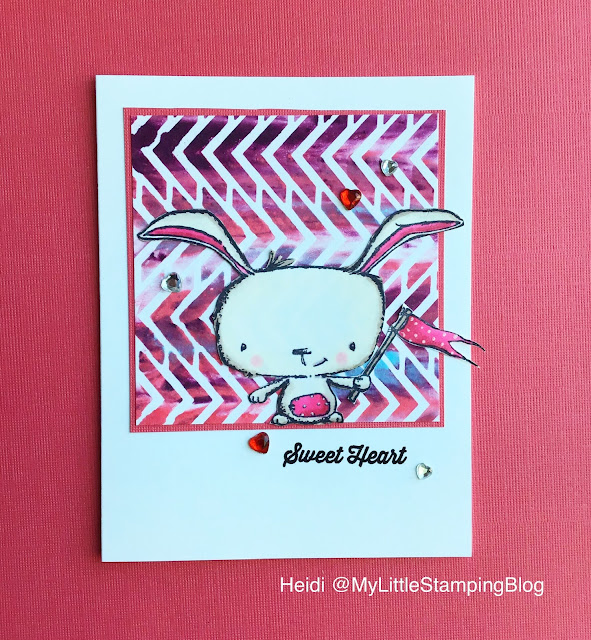
 Today I would like to share this cute spring bunny.  She is peaking out of a spring meadow.  

How I did this card was starting with watercolor paper.  I took 3 shades of Distress inks and sponged them on the side of my panel. I didn’t bother doing any masking or anything, just sponged them on and blended.  The colors are Scattered Straw, Mowed Lawn and Broken China.  I then splattered some clean water on to get texture, and then, I splattered some water colored with the Broken China blue ink to get some colored texture.  


After this dried, I stamped my bunny over top with Versafine Black ink.  I used water based markers to fill in the image and then blended it with a wet brush.  

After adding this sentiment on a green strip and matting with the same color, I finished the card with a few different tiny orange gems.  

I really like the spring look of this card!  I hope it gives you an idea too.

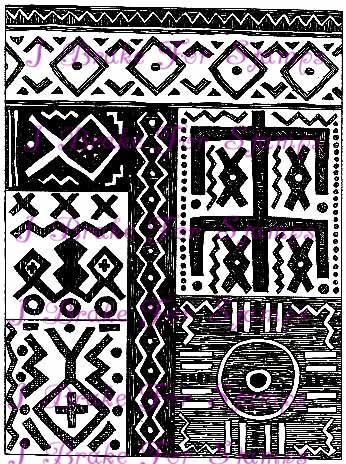
The stamp I used is from the I Brake for Stamps store and it is called Large Rabbit.  It is available both separate and as a part of this great set called MS110 Full Plate. You can use my affiliate code BPMHeidi to save 15%.

You can also find more inspiration at the links below:

The Blank Page Muse- https://blankpagemuse.com/

FB Fan Page- https://www.facebook.com/groups/blankpagemuse/

Instagram Shop- https://www.instagram.com/blankpagemuse/

Instagram Blog- https://www.instagram.com/blankpagemuseblog/

Twitter- https://twitter.com/BlankPageMuse

Pintrest- https://www.pinterest.com/blankpagemuse/boards/

Monday, March 27, 2023

Hero Arts MMH March 2023 Card Idea - Squeeze the Day - Ombré Background

 Hello stamping friends!  I have a card to share today that uses my March Hero Arts My Monthly Hero kit.  I used a technique for Ombré technique that is new to me.

I first stamped and heat embossed the background stamp on watercolor paper.  I then used direct-to-paper to apply Distress Ink in Spiced Marmalade right across the center of the page.  I made sure this applied darkly. 


I then took a damp baby wipe and used circular motions to spread that ink toward the edges of the paper.  This is what gives you an easy ombré look.

This was fun to do and I will be trying it with some of my other background stamps too.  I found this idea that adapts very well to heat embossed stamps from this blog.

Have a great day!

Friday, March 18, 2022

Have a Purr-fect Day!

 Hello everyone! I was feeling chilly the day I made this card.  


I first made a background with Distress Oxide inks, water and an embossing folder. I inked up my white cardstock with a brown and green inks.  I then spritzed the embossing folder with some water and closed it over the inked paper so the water would transfer to the paper. You don’t run it through your machine, just open it back up and let the water evaporate so you get the pattern on the paper.  It is a subtle pattern, but very pretty.  The same sweater embossing folder is the background of the card. You can find this old technique  explained in photos here

I stamped over the background with my quilt stamp and cut it out.  

Then, I stamped my cat on kraft cardstock.  I applied nail polish to parts of it with a metal tool.  I did two layers because the first layer sinks in a little.  I then fussy cut the cat out.  

I really like how this turned out!

Please consider using my affiliate coupon code BPMHeidi to save 15% off your order from either shop!  

Heart Quilt from the I Brake for Stamps shop

Edgar Cat set from the Blank Page Muse shop

Other supplies used:

Fun Stampers Journey Embossing folder

Versafine Sepia ink


Thanks so much for visiting today!


You can also find more inspiration at the links below:

The Blank Page Muse- https://blankpagemuse.com/

FB Fan Page- https://www.facebook.com/groups/blankpagemuse/

Instagram Shop- https://www.instagram.com/blankpagemuse/

Instagram Blog- https://www.instagram.com/blankpagemuseblog/

Twitter- https://twitter.com/BlankPageMuse

Pintrest- https://www.pinterest.com/blankpagemuse/boards/


Tuesday, November 30, 2021

Autumn Leaves Thank You Card

 Hello everyone!  I am back with a design team post!  I had a productive time making cards the other day and this one was my absolute favorite of the bunch!


I frequently just make backgrounds so that I just about always have things to start from.  For this card, I decided to stamp the leaf on two watercolored backgrounds.  One was a plain green, and the other was brusho sepia.  After I fussy cut these, I sponged some Tea Dye Distress ink around the edges to add depth. I also used tool to curl up the edges of the leaf.  


Then I stamped this lovely flourished Thank You and die cut it.  I masked off the frame of the die cut and then stamped the little thicket stamp over top in a very light beige ink, and I also sponged over the edges with Speckled Egg Distress ink.  I really liked how that turned out.  

The stamps I used here are from Blank Page Muse.  I have a code that will give you 15% off your BPM order, OR at the sister store I Brake for Stamps.  

BPMHeidi

Fancy Thank You Stamp

Fall Rubber Stamp set by Pam Bray Designs (stamps also available individually)


You can also find more inspiration at the links below:

The Blank Page Muse- https://blankpagemuse.com/

FB Fan Page- https://www.facebook.com/groups/blankpagemuse/

Instagram Shop- https://www.instagram.com/blankpagemuse/

Instagram Blog- https://www.instagram.com/blankpagemuseblog/

Twitter- https://twitter.com/BlankPageMuse

Pintrest- https://www.pinterest.com/blankpagemuse/boards/

Saturday, September 18, 2021

Paper Scrap Background

 The other day, I was determined to use up this certain patterned paper pack. There were no whole sheets left, most were just 2 inch strips.  I thought of a card I received from my stamping friend April. She blogged about it in March 2019.  If you go to her post Here, you will see I commented there that I was going to try it.  Well, two and a half years later, I have!


The pansy stamp is sadly retired from I Brake for Stamps (but great news, their store has reopened, more on that soon) called Three Pansies. The sentiment is  from Close to my Heart Birthday Parade, paper is Recollections Backyard Table, Distress ink for edging was Picked Raspberry. 

Thursday, June 18, 2020

Rainbow Card Backgrounds

Hello!  Today I’d like to share a couple cards made with some rainbow backgrounds.  First, I heat embossed my very old Hero Arts stamp on watercolor paper.  I then applied distress inks to just a thin portion of a long acrylic block, and spritzed this with water. I applied this to the paper starting at the top, and changing colors as I went down. I made sure that the ink was watery enough to blend between colors.  


I finished off one card with a simple sentiment from Power Poppy, and the other with some images from a Hero Arts My Monthly Hero Kit.  I think these are super fun, and my teenage son told me that I could give them to girls or boys, so that felt like a really big win!

I’d like to enter A Blog Named Hero’s Old and New challenge, and Word Art Wednesday’s Anything Goes Challenge.

Thanks for visiting!

Friday, October 25, 2019

Not too scary Halloween Cards - Distress Oxides

Hello everyone!  Most of the Halloween cards that I am going to share in the next few days were made using a combo of my time spent at my craft group, plus time spent at home.  I have found that traveling with my supplies is best used by making “pieces-parts” of cards.  

So, one week at craft group, I brought my Distress and Distress Oxide inks, and made a bunch of backgrounds.  I added ink with direct-to-paper techniques, and then added some water to blend them, and sometimes added salt to get texture.  

Another week, I brought stamp sets and just stamped out a bunch of images, colored them, and fussy cut them out.  I actually have a bunch of Christmas images done that I need to make into cards, too.  

Then I take them home, and I find it easier to put cards together there, where I have all my craft supplies at my fingertips.  Then I am able to make a variety of cards.

The first Halloween card, I stamped a creepy tree in the background, added black ink around the edge and then just added my cute costumed kids.  I really like this combo of creepy images and cute.  I don’t like too scary of cards for Halloween.


The second card, I went with a lot more detail.  I not only used my salt-treated oxide background, but I die cut and popped up some hills, stamped a haunted house on yellow and added glossy accents to the window.  I really love how this one turned out, and I hope the photo does it justice!


Supplies: Stampendous Bring to Life stamps set, Hero Arts CL057 October set, Just for Fun Rubber Stamps Haunted House and Tree, Distress Oxide ink and Versafine ink in black, Distress Oxide (card 1) Twisted Citron, Lucky Clover, Salty Ocean, (card 2) Seedless Preserves, Wilted Violet, Black soot,  Avery Elle Wonky Stitched Rectangles dies, Frantic Stamper stitched borders dies, other items from my stash.

I would love to enter the SimonSaysStamp’s Monday Challenge Spooky, and Lost Coast Portal to Creativity’s Halloween Challenge.

THANK YOU for your visit today!  Hope to see you again soon!

Friday, August 30, 2019

Pinned It? Try it! Week 3: Make Your Own Multicolor Inkpad

Hello everyone! I am back again with another episode of Pinned It? Try It!  This time, I have a pin that is probably 8 years old that was a photo on Flickr, but has since been deleted.  This is where Pinterest really shines, I think, in preserving that for us.

The Pin is HERE.  You will want to take a look at the photo.  The text on the Pin says, “Inks added to acrylic block, spritz with water, lay stamp over it and then stamp onto watercolor paper.”  Basically, it is making your own multicolor stamp pad.  

I bet I pinned this because I really like that stamp, which I recall is a Hero Arts stamp. I don’t have it, but I do have another in the same style and era.  I naturally grabbed that stamp to try this technique.  It is Hero Arts Silhouette Bells.

So, I followed the directions, as written... I decided to use Distress Inks, as I figured any dye ink ought to work (and probably many other inks, too.) Not so good results!!!


However, my experience told me to first apply Versamark clear embossing ink to the stamp, and then the homemade inkpad.  Much better!


Here is the card I made using this image. I finished it off with an embossing folder and a sentiment from Close to My Heart’s Wordfetti stamp set.  


This is not an exact technique and the results do vary.  The nice thing about watercolor paper is that you can just turn the paper over and use the other side, no problem.  In addition, for this next card, I got a good result for much of it, and then a blank spot on one part of the image, that I just cut off.  It helped stretch my stamp, too!


Of course, you don’t have to use an acrylic block for your surface, your craft mat might work just as well.  And you can probably use watercolor markers, distress Oxide inks, etc.  I think many people have expanded on this technique over the years.  That is the funny thing about stamping techniques, as the first person to post it on the internet might have learned it at a stamping party first, so we often don’t know who thought them up in the first place.  ANYHOW... I’m going on and on today!

Thank you for visiting!!
If you want to catch up on previous episodes, find all my Pinned It? Try It posts HERE.

I would love to enter this in A Blog Named Hero’s Stretch Your Stamps challenge, and CASology’s Water Challenge.


Tuesday, June 4, 2019

JFF’s June Challenge - Use a Stencil

Hello! I am happy to announce that Just for Fun’s Blog challenge this month is to incorporate a stencil into your stamped design.  I really enjoy using stencils, so I was happy to play along this month.


My background was created by applying ink directly to a stencil with Distress Oxide ink in Antique Linen.  Then I spritzed the stencil with water and pressed it to watercolor paper to make a monoprint.  I was tickled to see that the tan ink separated out into both tan and a light green.  Brown inks are always fun when they separate.  


Then, I used my stamping platform to stamp my fern in green oxide ink, and then I just added brown oxide ink to a few parts of the fern and stamped it again.  I liked the way it turned out.  My Father’s Day greeting was stamped directly to my ivory card base using a dye ink.  

Supplies:  Just for Fun Rubber Stamps Flora and Fauna sheet, Happy Father’s Day, Creative Expressions Autumn stencil, Distress oxide inks in Antique Linen, Vintage Photo and Peeled Paint, watercolor paper, Hero Arts Shadow Ink Forever Green, Gina K Designs Dark Sage cardstock, Michaels 110 pound ivory card stock.

Hope you will join in the challenge this month!


Wednesday, May 29, 2019

Pride of Africa card, and a bonus card!

Hello everyone! I hope you are doing well today. Didn’t the month of May just fly by!  I am back from my trip and am going to need the whole day to get myself together!

I have a two cards that are a bit outside my typical style, but I really ended up liking them!  I usually choose stamps that I just like (which is a lot of flowers and birds!) but sometimes I like to send cards that are different, and these projects fit the bill.  


I created my background by swiping Distress Oxide inks onto watercolor paper, and then giving a light spray of water.  When dry, I stamped the Pride of Africa stamp right over top.  

I also stamped a background stamp called Tribal Blanket, using tan ink, onto kraft cardstock, to create a subtle tone on tone look.  I really love that it is patterned, but doesn’t compete with the main image.  It was no problem to stamp my greeting, Thank You, on this panel.


Now, onto a “bonus” card!  

So, I just loved that background stamp, and wanted to use it a little more. I had a plain white Hello die cut sitting on my desk, so I decided to dress it up by stamping on it with both green and orange inks (also still on my desk from the other project.). I then colored over the rest of the white by pressing it directly to my yellow inkpad.  


I then stamped my Large Oak Tree with brown ink onto some white kraft cardstock and put the die cut directly over.  This turned out to be a great, everyday masculine card.  

(Don’t forget you can always save 10% off your entire order at the I Brake for Stamps store, using my coupon code, SAVE10HEIDI) 

I hope you will be inspired to choose some stamps outside of your ordinary with your next purchase! Thanks for stopping by and have a good day!


Tuesday, February 12, 2019

Shaving Cream Stencil Technique - Valentine Card

A couple weeks ago, in my stamping group, we were challenged to use the Shaving Cream Stencil Technique by UnderstandBlue, blog and video is here. I made several backgrounds because it was really fun!


This background was made with Distress reinkers, I think in Tumbled Glass, Worn Lipstick and Dusty Concord. I was surprised how deep the colors were, I could have used less reinker!  I paired this with a cute bunny image.

I would love to enter this in Word Art Wednesday’s Anything Goes challenge.

Supplies: Purple Onion Poppy stamp, Jillibean Soup Sweet Treat stamp set, Memento and Versafine Onyx Black ink, Distress Reinkers Tumbled Glass, Worn Lipstick, Dusty concord, Balzer Designs Mini Chevron stencil, Spectrum Noir alcohol markers, other items from my stash

Thank you so much for visiting today!

Thursday, November 29, 2018

Snowman with Friends Christmas Card

Hello!  I hope you are well!  I have a cute snowman card I would like to share today.


This card was created with a few layers, all starting from plain cardstock and watercolor paper.  First, the blue background is a watercolor wash.  I stamped the image on this bottom layer first.  Then I stamped it again on plain white cardstock, colored the image and fussy cut out a portion of the image to paper-piece over the blue watercolor wash.  I added Wink of Stella glitter all over the snowy hill.

The frame is watercolor paper with distress inks (blues, purple, black) sponged on and then perfect pearls + water flicked onto it.  I die cut the frame.  


Supplies: I Brake for Stamps Snowman and Friends, Memento black ink, alcohol markers, Wink of Stella, Distress inks in Tumbled Glass, Chipped Sapphire, Black Soot, Dusty Concord, Perfect Pearls, Watercolor paper, Koi Pan watercolors, Avery Elle Wonky Stitched rectangle dies.  

Save 10% on your order at I Brake for Stamps with my code SAVE10HEIDI.

I would love to enter SimonSaysStamp’s Wednesday Anything Goes challenge, ModSquad Challenge blog’s Critter Christmas challenge, and Lost Coast Portal to Creativitiy’s Cute challenge
Thank you so much for your visit today and all your kind comments.  You all are such an encouragement to me.  

Thursday, November 15, 2018

Northern Lights Background

Hello everyone! Hope you’re doing well today!  It is supposed to snow a little bit here today, so these polar bears will feel right at home.


I heat embossed the trees onto watercolor paper with white embossing powder. I wanted the sky to mimic the aurora borealis, or Northern Lights.  I used sponges to add Distress inks in mint green, purple and dark blue.  I sprayed the panel with water to allow the colors to blend.  Once dry, I used a glitter gel pen to add some stars, and gems just to be festive.

I simply stamped the Polar bears, added a few shadows with a grey copic marker and trimmed them out to add under the sky.  I think they are enjoying the view!

Supplies: I Brake for Stamps Trees Background stamp, Mama and Baby Polar Bears stamp, Versamark ink, Recollections White detail embossing powder, Memento Black ink, Distress ink in Chipped Sapphire and Dusty Concord, Distress Oxide ink Cracked Pistachio, Sakura glitter pen, other items from my stash
(Save 10% on your order at I Brake for Stamps with code SAVE10HEIDI)

I would love to enter Cute Card Thursday’s Stars challenge

Wednesday, November 7, 2018

Clean & Simple Stamptangle Oak Leaf

Hello!  Hope you are all well today.  The sun is finally shining again and I can better appreciate the gorgeous fall color.  Our autumn color is a few weeks late this year, so it is really colorful outside, although I fear that when all the leaves fall and it is time to rake, it will be very cold.  We shall see!


I have a clean and simple design to share today. I heat embossed my Stamptangle Leaf in gold, and then sponged over Distress inks.  I first tried Distress Oxides, but the color was not bright enough with the oxidation clouding over it, so I went with regular Distress Inks.  


I used a wood grain embossing folder on my white card and then cut a circle in some textured brown cardstock in my stash.  The greeting (which is so cute, don’t you think?) and a little twine bow and my card was done.  This design was one of my quicker cards to make!  Bonus!

I’d love to enter Cute Card Thursday’s Anything Goes challenge as well as Word Art Wednesday’s Anything Goes Challenge.


Supplies:  Just for Fun Rubber Stamps Stamptangle Oak leaf, Happy Autumn, Versamark ink, Recollections Gold Detail Embossing powder, Distress Inks in Barn Door, Spiced Marmalade, Fossilized Amber and Peeled Paint, Versafine Vintage Sepia (for sentiment), Darice Woodgrain embossing folder, circle die and other items from my stash.

Thank you for your visit today! Special thanks to those of you that comment and follow my blog. I have a sick kid at home, but hope to be around to visit you all later on today.  

Sunday, October 21, 2018

Dracula Halloween Card

Hello! Thanks for coming by!  I was able to make a card for some challenges, so I am back with another post today!

(I didn’t have trouble commenting elsewhere yesterday, so that is a good sign!  It seems like it is just one variation of the google/blogger comment form that is an issue.)


I colored the creepy Dracula image with alcohol markers.  I then stamped the tree onto some patterned paper.  This paper is meant to be a tropical sky, so I edged it with black distress ink.  I was not happy that it covered so many of the stars, so I added flicks of white paint.  Dracula was then popped up onto the card with foam tape.  

Supplies:  Just for Fun Rubber Stamps Dracula and Crooked Old Tree, Memento and Versafine Black inks, Aquarelle 6x6 patterned paper pad, Distress Ink Black Soot, white acrylic paint

I would love to play along with The Library Challenge - Dracula, and SimonSaysStamp’s Monday Challenge - Starry Night.

Saturday, July 14, 2018

Tropical with Distress Oxide inks

Hello!  Thanks for stopping by today.  I wanted to share a card I made using a technique I learned from my friend April.  Check out her blog here.  

For the background, I stamped in three Distress Oxide colors.  Each stamping, you will ink up your stamp, spritz it with water before stamping. You will move your stamp slightly with each stamping.  I used my stamping platform to make this a little easier, but it certainly isn’t needed.  First was Antique Linen, then Twisted Citron, and finally my darkest color was last, that was Peeled Paint.  It’s a fun technique and can be done with lots of different background stamps.  


The hibiscus is a stamp layering set.  I also used all Distress Oxides for this, spritzing the stamp with water before stamping.  So pretty and a great finish for the card without covering up too much of my background.  Clear Nuvo drops were added for decoration.

Supplies:  Just for Fun Rubber stamps Bamboo background stamp, Hero Arts Layering Hibiscus stamp and dies, Distress Oxide inks (pink flower) Worn Lipstick, Picked Raspberry, Candied Apple, (orange flower) Wild Honey, Abandoned Coral, Candied Apple, Black Soot for flower centers, Peeled Paint, Twisted Citron and Antique Linen, scrap cardstock, Gina K Sentiment with Versafine black ink, Clear Nuvo Drops.

Thanks for stopping by!  
I always appreciate your visits and comments! Please consider following my blog using the Blogger tool on the side bar, or on facebook or pinterest, too.

Wednesday, May 30, 2018

Thinking Happy Thoughts - Rain Background

Hello!  A bit of a quick share today.  I created this rainy background using a technique with Distress Oxides.  I saw something similar on Karen’s blog.  


You smoosh the Distress Oxides on your craft sheet and wet them with a spritz or two of water.  Then use the edge of a piece of acetate packaging (or a small strip of acetate would work too) pick up the inky water and apply to your cardstock.  It controls the application a little so you can keep your card a little more clean and simple.

Supplies:  Just for Fun Rubber Stamps Girl with Umbrella Silhouette, Sentiment sheet 1, Distress Oxide Black Soot, Faded Jeans and Broken China, Versafine Black ink, Avery Elle Wonky Stitched Rectangles dies

Thanks for stopping by today!

You can find me on facebook or pinterest, too.

Monday, April 2, 2018

Charitable Cardmaking - Beach Cards for Domestic Abuse Survivors

Today, I am spotlighting a special project that cardmakers can help with.   Carole at From My Carolina Home is creating Summer Themed Gift bags for residents at her local domestic abuse shelter, Project Safelight.  She is accepting monetary donations, donated sewn goods and handmade cards!  See her detailed blog post HERE.  (Note that Carole has arranged for some random prizes for this project!)


Since there are special considerations regarding the sentiments for these cards (all contained in the blog post link above) I decided on this sentiment from Gina K Designs set I have.  I was formerly inclined to use it only with sympathy cards, but after emailing Carole about it, we both decided that it would work well for the people in the shelter.  

Plus, I had really wanted to do beachy cards to go with the summer theme, so the sentiment works great with these silhouette stamps from Just for Fun.  I went ahead and made some backgrounds using Distress Oxide inks on plain cardstock.  To get some control over the color placement, I picked the color up on a piece of acetate and then applied it to my card.


I used Distress Oxide Black soot to stamp out the images.  I find this always works perfectly for me with the solid stamps, so I am sticking with it!  The sentiments were stamped with Versafine.

Supplies: Just for Fun Rubber Stamps Dolphins-Palm Silhouette, Pier Silhouette stamp, Tiny Flying Birds stamp, Gina K Designs Inspiration Mosaic set, Versafine Onyx Black, Distress Oxide inks Abandoned Coral, Fosilized Amber, Salty Ocean, Broken China, Worn Lipstick, Black Soot, cardstocks from my stash, Cuttlebug Decorative Frames embossing folder.

If you have time, I hope you will send some cards, or a monetary donation to support this charitable drive!  Remember to sign them on the inside and send an envelope!  Cards are due April 30, 2018

You can find me on facebook or pinterest, too.

Friday, March 2, 2018

Peacock Card with Distress Oxide Inks

Hello!  TGIF!  It is so rainy here, but I am looking forward to the break of the weekend.  I would like to share a card I made for a mix of challenges, including a brand new one!  Scroll down for more information.


I used my stamp positioner to first stamp the peacock image in the three tones of blue Distress Oxide ink.  Then, I inked just the edges of the stamp in black Distress Oxide (which, of course, is actually grey, given that it oxidizes a little) and stamped again.  I really loved the rich look of this.  I added Nuvo Glitter drops to the tail.


Supplies: Hero Arts Peacock stamp, Distress Oxide inks in Salty Ocean, Peacock Feathers, Faded Jeans and Black Soot, Just for Fun Rubber Stamps Thanks sentiment, Nuvo Crystal Drops in Clear Glitter, other items from my stash.

I was inspired by these challenges:
The Library challenge - Pride and Prejudice **brand new. I was inspired by the cover of the book
SimonSaysStamp Wednesday Challenge - Anything Goes
Word Art Wednesdays 324-325 Anything Goes


I hope you will have a wonderful day!  Thanks for visiting!

You can find me on facebook or pinterest, too.

Wednesday, January 3, 2018

Galaxy Cityscape Greeting Card

I am a little late on the Galaxy bandwagon, but it is really a fun one!  Have you tried it?

I used regular distress inks on watercolor paper and dropped water onto it.  Then, when it dried, I used a white gel pen to add some stars.


Of course, over top, I heat embossed the Cityscape in gold.  


Supplies: Just for Fun Rubber Stamps Skyline Silhouette, Colorful and Happy sentiment, Distress Inks Dusty Concord, Mustard, Black Soot, Peacock Feathers, Broken China, Picked Raspberry, Watercolor paper, Versafine Black ink, Versamark embossing ink, Recollections Detail Gold Embossing Powder.


Thanks for stopping in today!  I appreciate your visit!