Just stopping in to share this card. I really like it!


Spellbinders Embossing Folder
Taylored Expressions Sentiment
Gina Marie Stitched circle die
Creative Expressions Flamingos
Hero Arts Layering Stamp and Dies
Thanks for looking!
Just stopping in to share this card. I really like it!
Spellbinders Embossing Folder
Taylored Expressions Sentiment
Gina Marie Stitched circle die
Creative Expressions Flamingos
Hero Arts Layering Stamp and Dies
Thanks for looking!
Hello Crafty Crafters!
One thing I have started buying, or receiving as gifts, is ephemera packs. There are so many pretty ones out there (and they typically come with A LOT of pieces) but I realized I wasn’t using very many up if I just used them as a focal point here and there. So I endeavored to change that!
Here are 3 cards where I used up quite a bit of Ephemera in simple ways…
1) First off a very simple card, but I added some interest by layering a 4 pieces of ephemera. The background here is a background stamp by Purple Onion designs. I like the way the gold foiled parts look together.

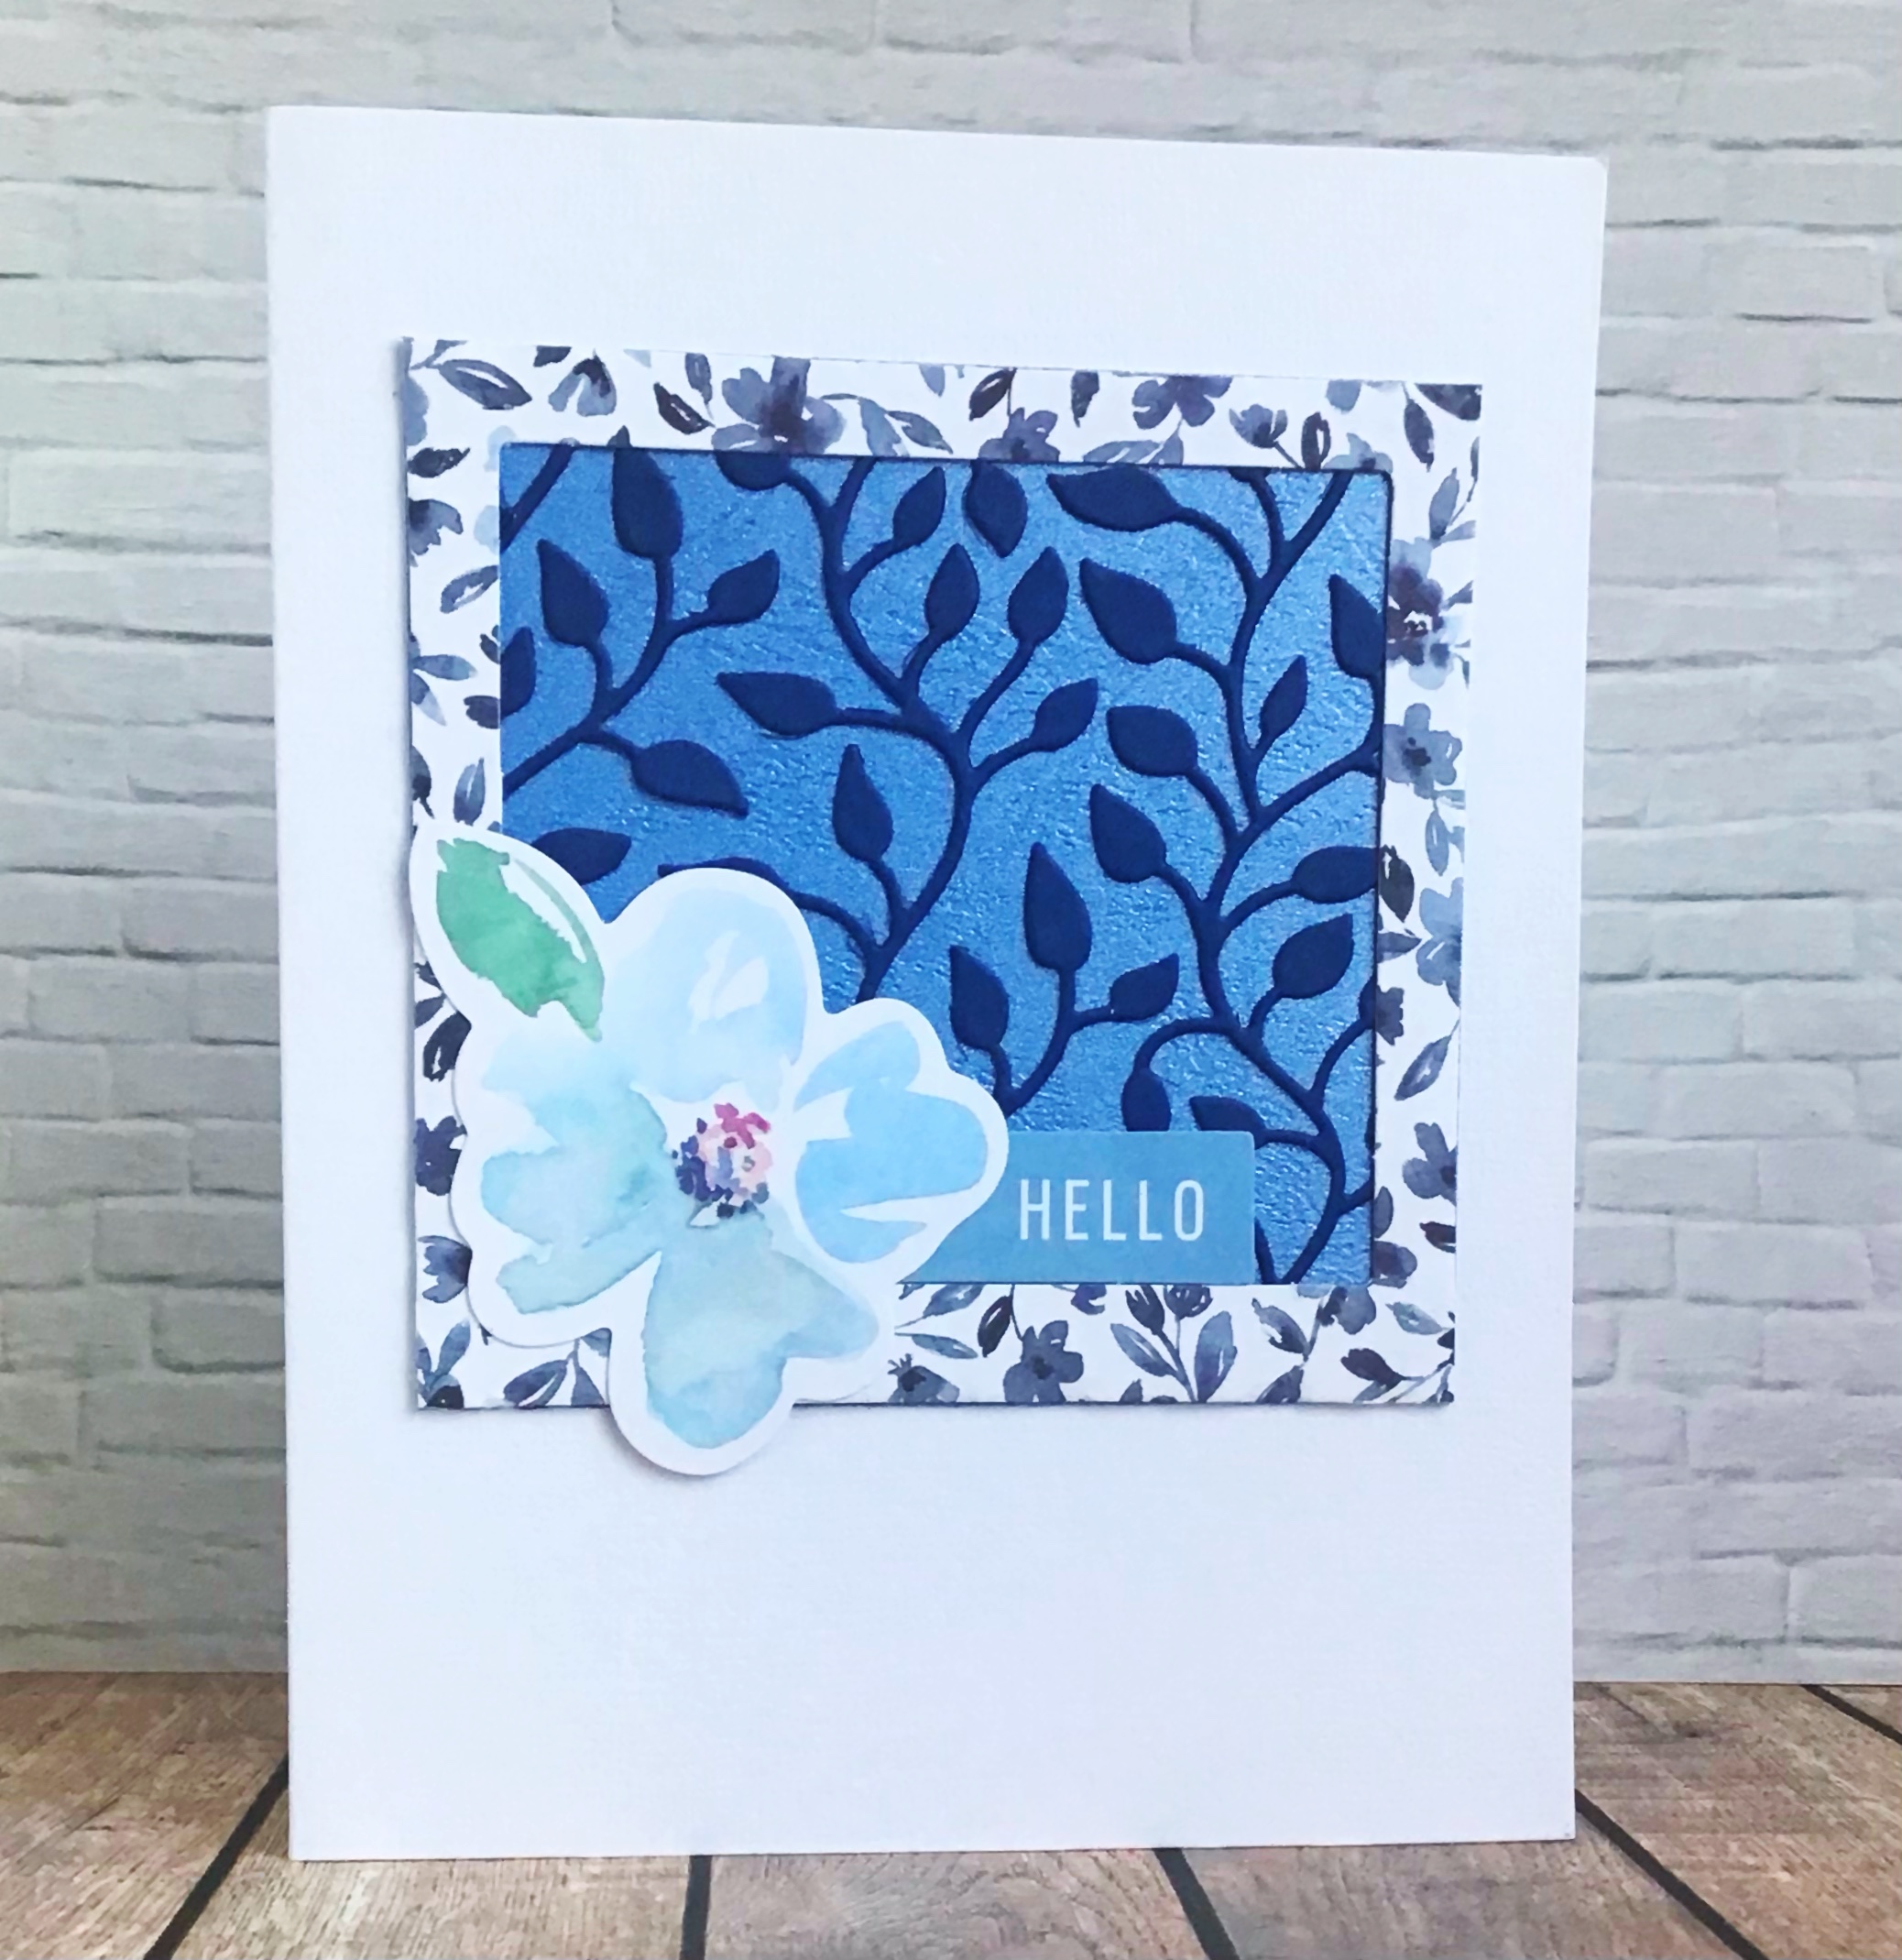

This post is the simple ways to use Ephemera but I have some more ideas coming that use lots more! See you then!
Hello and Happy Friday!
Today’s cards are another set. They all use Close to My Heart Embroidered Card Front stamp set, one uses Close to My Heart Cross Stitched Love (sentiment) and two are using the cute set of Strawberry dies from the Spellbinders 2023 Advent Calendar.

For the card with the white circle inserted, I got out my Gina K Wreath Builder stencil to put the extra “embroidery” on that one. I hadn’t used that technique in years, so it was fun and easy.
Thanks for stopping by and I hope you have a good weekend!
~~Heidi
Happy Valentine’s Day to all!
I have a few cards to share that fit the theme a little. What I have been doing when creating is making a card, and then kindof going with a variation on that theme for a few cards. So I either make a card set, or just use some of the same supplies that are out, or the same colors, etc. It has helped me to start rebuilding my card stash.


Hello again! I have been busy doing Valentines so that I can send them out on time.
Here are a few that I made using mostly Spellbinders club items.


Hello! I took a long, needed break from blogging. But I am going to try to be back on a limited basis. I quit design teams, they weren’t worth the workload and time to be paid in supplies (if they remember to send you them… another story).
I am interested who is still blogging and what challenges are inspiring and worth entering! Please leave me a comment!
I have these two cute Valentines to share with you today. They are going to go to my nieces.


I won’t always be posting a full supply list, nor will I usually post links. Probably 90% of my stash now is retired. If I ever leave a product out that you are interested in, and I didn’t tell you, please leave a comment to let me know and I will figure it out and tell you!
But here is a basic list:
Pink and Main Perfect Blend Stamps and Dies
Bo Bunny Early Bird 6x6 paper pad.
I will also mention the tiny silver sticker I added between the two patterned papers, which isn’t super visible in the photos but is super cute in person. Those are from Starforms. My goodness, I didn’t know they were so hard to find now. I purchased a few from an Etsy shop yesterday. They were made in the Netherlands and I don’t know if they went out of business or just no one is importing them anymore. They are a great finishing touch for a car though!
Thank you to anyone who is still reading! Have a good day!
Hello from design team member, Heidi. Summer is here and bring on the beachy crafting! One of my favorite stamp sets for this is I Brake for Stamp’s By the Sea Rubber Sheet. It has fun images, especially this Turtle, in two sizes.
How I made this card was by first sponging blue ink over the center of my white card. I used the same ink to stamp several of the little stamps on the back ground. I think I used the shell, the seahorse and the fish. Then I splattered some water drops over top.

Second, I used a blue cardstock and die-cut it to a rectangle. I sponged the same blue ink around the edges here. I stamped and colored the turtle on white. I trimmed it out. I then added my sentiment and put the turtle right front and center.
I like to be able to mail flat cards, so I didn’t add anything else, but this card would look great with some knotted twin.
I hope you are enjoying your summer and summer crafting!
Hello! I have always thought that there is no reason why flowers should not be masculine. Every guy I know likes flowers. Anyhow, it is corny but I decided to use a flower and masking and make it sortof a masculine card.

I used this HUGE Dahlia stamp. It is such a great stamp, I use this one a lot.
1) I used a grid to mask a straight section of my card front. I used Mint Tape, and I didn’t even measure how wide it is.

2) Stamp right over the tape so that the flower shows up on either side.

3) Using both the tape and a ruler, use a black marker or pen to draw a border on the flower. I didn’t extend beyond the stamped image, but depending on what length of sentiment you will use, you totally could extend it, even to the edge of the card.

4) Remove the tape and then stamp your sentiment in between the lines.

I finished the card by coloring just little parts of the flower with a light grey and a green marker. I then matted the card front with grey cardstock and voila, a clean and simple Thank You card, suitable for any recipient. Even a guy.
This card uses Quarter Sheet Dahlia stamp set and also the sentiment comes from Fall Rubber Stamp set by Pam Bray Designs.
You can also find more inspiration at the links below:
The Blank Page Muse- https://blankpagemuse.com/
FB Fan Page- https://www.facebook.com/groups/blankpagemuse/
Instagram Shop- https://www.instagram.com/blankpagemuse/
Instagram Blog- https://www.instagram.com/blankpagemuseblog/
Twitter- https://twitter.com/BlankPageMuse
Hello! I am going to share with you today a Trellis card. These seem to be all the rage and I found out they are not difficult!
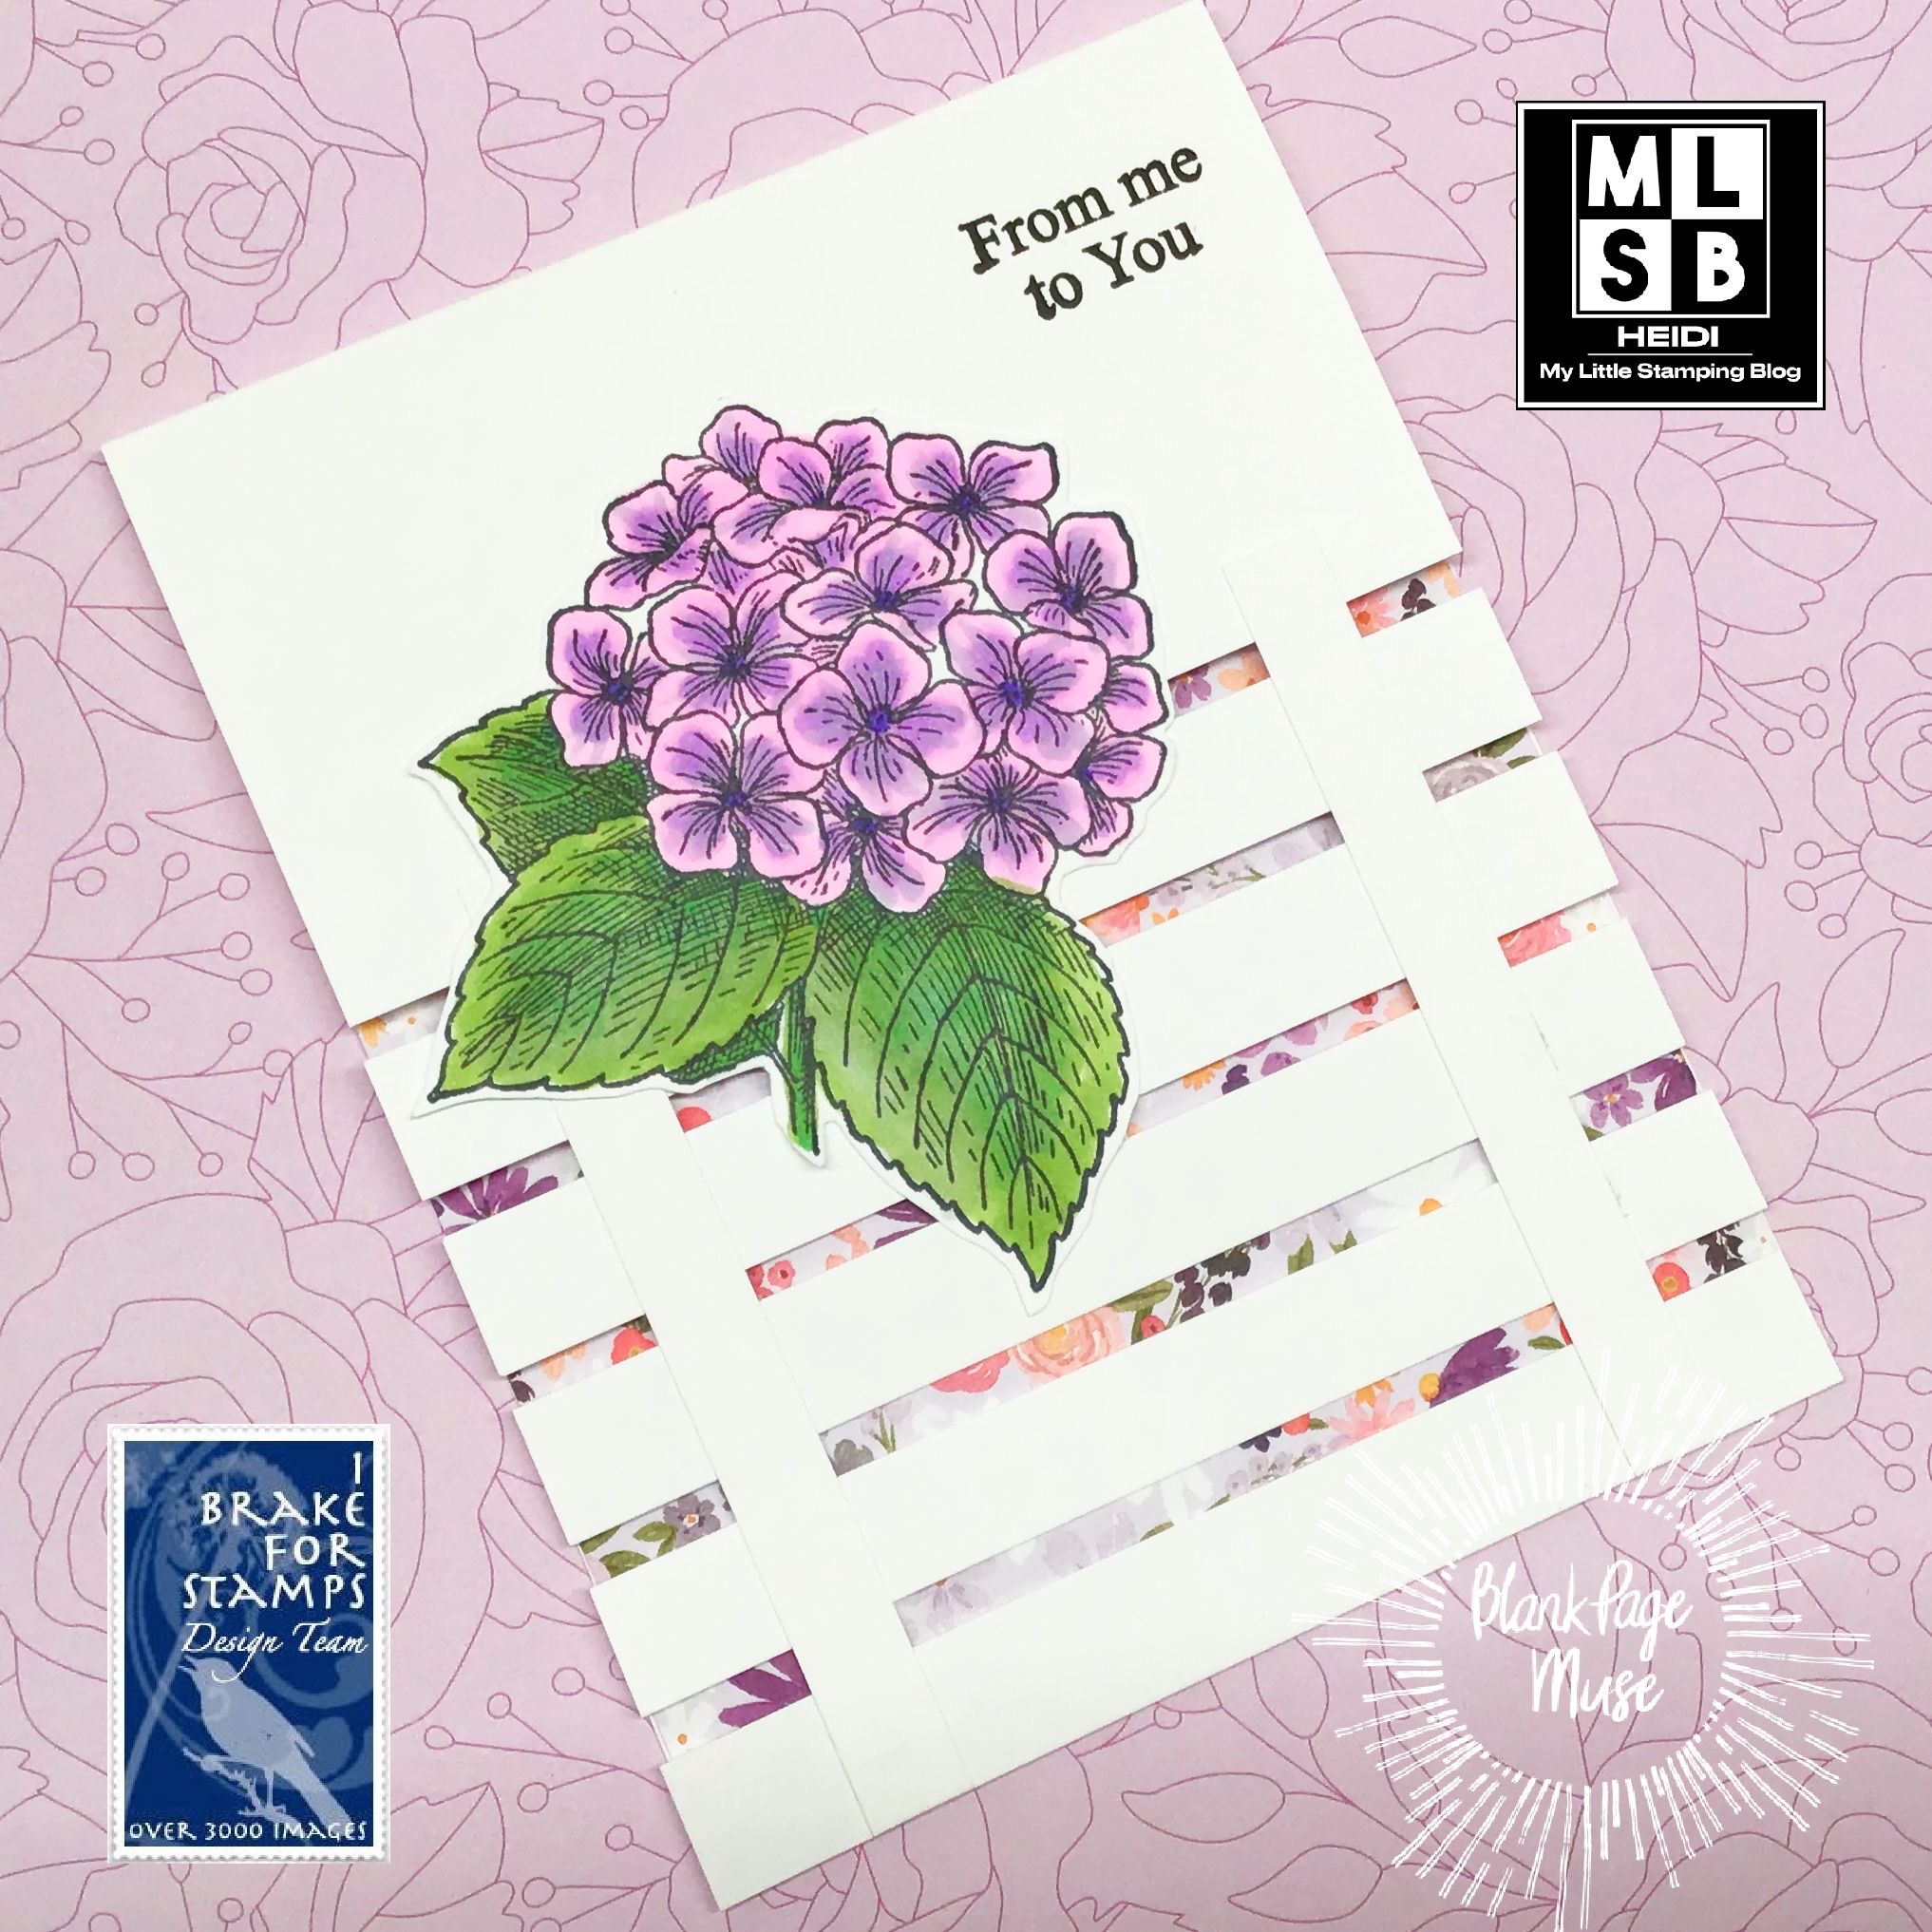
1) Start by creating a top fold card and folding it. Cut 3.25 inches off the front flap.
2) Create your trellis pieces. You will need 5 pieces for your horizontal slats that are 4.25 x 0.5 inches, and then for the vertical slats, 2 pieces that are 3/8 x 4 inches, and then for the inside vertical slat reinforcement, 2 pieces that are about a 0.25 x 4 inches.
So that is 9 pieces total.
3) Now you want to get some washi or low tack tape, and place it FACE UP on your card front. You have your card folded, and then just arrange the 5 horizontal slats in place. Start with the bottom one - line it up at the bottom of the back of the card, and then just eyeball the rest to be mostly even.
DO NOT stress out about exact perfect spacing.

4) Then put dots of glue in place for your vertical slats and place the wider slats for your card front. I used magnets to weigh these down, but you could use your stamping blocks. Note that these pieces are too long! That is a good thing and we will be trimming them later.

5) After a the front is dry, open up the card, and reinforce the inside with the thinner slats. These pieces also are too long and will be hanging off the bottom of your card. Once it is fully dry, trim the excess.

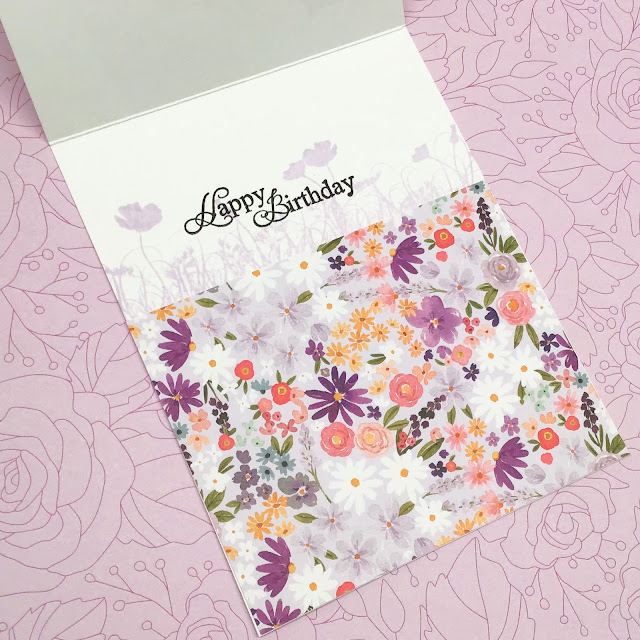
6) Cut a piece of patterned paper to line the inside of your card. It needs to cover the open areas, so it must be at least 4.25 x 3.25. Attach this to the inside of your card.
7) Decorate as you wish!
I used a beautiful hydrangea stamp for the outside of my card. I colored it and fussy cut it out.
For the inside, I used a floral border stamp from the same stamp set. I stamped this in light purple ink, and I did the stamping before I added my patterned paper, just to make it easier.
I then used some sentiments to finish off the outside and the inside and I was done!
The stamps I used for my card can be found in the I Brake for Stamps store.
Half Sheet Hydrangea Stamp Sheet
Sentiments from Florals Sheet Flowers for You
What do you think? Will you try, or have you already tried a trellis card?
You can also find more inspiration at the links below:
The Blank Page Muse- https://blankpagemuse.com/
FB Fan Page- https://www.facebook.com/groups/blankpagemuse/
Instagram Shop- https://www.instagram.com/blankpagemuse/
Instagram Blog- https://www.instagram.com/blankpagemuseblog/
Twitter- https://twitter.com/BlankPageMuse
Hello! Today I wanted to make another clean and simple card, but this time, using some patterned paper scraps and ephemera.
I punched out three 1.25 inch squares of patterned paper. I then cut white cardstock at 4 x 5.25 and embossed it. This is optional, but I then used my paper scoring tool to scores some lines to be my guide for adding the square patterned paper pieces in a straight line. It also adds a decorative border.

After that, I just chose something from the coordinating ephemera pack to finish off my card. Not ever card needs to be difficult!
The paper pack and Ephemera is from Pam Bray’s Masquerade Line.
You can also find more inspiration at the links below:
The Blank Page Muse- https://blankpagemuse.com/
FB Fan Page- https://www.facebook.com/groups/blankpagemuse/
Instagram Shop- https://www.instagram.com/blankpagemuse/
Instagram Blog- https://www.instagram.com/blankpagemuseblog/
Twitter- https://twitter.com/BlankPageMuse
Hello! I hope you are having a nice springtime. I was in a clean and simple mood today!
I love this strawberry border stamp and it is so easy to color and cut out. The I Brake for Stamps store has a good selection of border stamps to choose from! You can find them here.

I simply added a little border of patterned paper to the bottom, and matted the cardfront in red cardstock. I think it is going to work great for my friend who recently broke her leg.
Sentiment from Everyday Phrases
You can also find more inspiration at the links below:
The Blank Page Muse- https://blankpagemuse.com/
FB Fan Page- https://www.facebook.com/groups/blankpagemuse/
Instagram Shop- https://www.instagram.com/blankpagemuse/
Instagram Blog- https://www.instagram.com/blankpagemuseblog/
Twitter- https://twitter.com/BlankPageMuse
Today I would like to share a card that is primarily stenciling. I used two colors of stencil butter, which are found in the Blank Page Muse shop. The ones I used are the pearl ones, and they are just sooooooo pretty! The photos do not do this justice - it was so hard to capture!


I just randomly applied the two colors stencil butter over the stencil to cover the stencil, and then when I scraped off the excess, they blended and mixed to get a really pretty look. The base for this was the silver glitter alcohol ink cardstock. It does hold up well to stencil butter.
I didn’t want to cover up any of the pretty stencil, so I used a fun circle sentiment over top, matted the card in the same color turquoise cardstock, and called the card complete.
If you haven’t had a chance to try these stencil butters, they are really a lot of fun, and easy and smooth to use. Thanks for visiting today!

The products I used in this card are:
The Crafters Workship Wave 6x6 stencil
Turquoise Stencil Butter
Denim Stencil Butter
I Brake for Stamps sentiment from Thinking, Happy, Get Well, Thanks set
Use my affiliate code for 15% off! BPMHeidi
You can also find more inspiration at the links below:
The Blank Page Muse- https://blankpagemuse.com/
FB Fan Page- https://www.facebook.com/groups/blankpagemuse/
Instagram Shop- https://www.instagram.com/blankpagemuse/
Instagram Blog- https://www.instagram.com/blankpagemuseblog/
Twitter- https://twitter.com/BlankPageMuse
Pintrest- https://www.pinterest.com/blankpagemuse/boards/
Today I would like to share this cute spring bunny. She is peaking out of a spring meadow.
How I did this card was starting with watercolor paper. I took 3 shades of Distress inks and sponged them on the side of my panel. I didn’t bother doing any masking or anything, just sponged them on and blended. The colors are Scattered Straw, Mowed Lawn and Broken China. I then splattered some clean water on to get texture, and then, I splattered some water colored with the Broken China blue ink to get some colored texture.

After this dried, I stamped my bunny over top with Versafine Black ink. I used water based markers to fill in the image and then blended it with a wet brush.
After adding this sentiment on a green strip and matting with the same color, I finished the card with a few different tiny orange gems.
I really like the spring look of this card! I hope it gives you an idea too.
The stamp I used is from the I Brake for Stamps store and it is called Large Rabbit. It is available both separate and as a part of this great set called MS110 Full Plate. You can use my affiliate code BPMHeidi to save 15%.
You can also find more inspiration at the links below:
The Blank Page Muse- https://blankpagemuse.com/
FB Fan Page- https://www.facebook.com/groups/blankpagemuse/
Instagram Shop- https://www.instagram.com/blankpagemuse/
Instagram Blog- https://www.instagram.com/blankpagemuseblog/
Twitter- https://twitter.com/BlankPageMuse
Hello and Happy Monday! Spring has definitely sprung so it is time for a bird card!
This was for another challenge in my Artsy Inkers online group where we needed to use three different embellishments. That was a little hard for me but I did come up with this.

This uses Stampin Up Birds and Branches stamps and dies. K&Company Antique Garden 6x8 patterned paper pad and Ephemera pack.
Hope you are having a good day! Thank you for visiting and all your kind comments.
Hello everyone! I hope you had a good Saturday and didn’t get fooled by anyone.
Today, I would like to share a masculine card that I made for a challenge in my Artsy Inkers group. We were to create this aperture by cutting an X in patterned paper and then fold it over. Connie calls it Bursting Out. I’m not sure if there is another name for this type of fold.

This was easy to do once I picked some double sided paper and found an exact-o knife to cut the x.
The stamps are Elizabeth Crafts Summer Sentiments and Camping Out and the paper is My Mind’s Eye Happy Camper. I did just color the image a bit with alcohol markers.
Thanks for stopping by!
Hello stamping friends! I have a card to share today that uses my March Hero Arts My Monthly Hero kit. I used a technique for Ombré technique that is new to me.
I first stamped and heat embossed the background stamp on watercolor paper. I then used direct-to-paper to apply Distress Ink in Spiced Marmalade right across the center of the page. I made sure this applied darkly.


I then took a damp baby wipe and used circular motions to spread that ink toward the edges of the paper. This is what gives you an easy ombré look.
This was fun to do and I will be trying it with some of my other background stamps too. I found this idea that adapts very well to heat embossed stamps from this blog.
Have a great day!
Hello from design team member, Heidi. Today, I could use your help. I don’t know what this flower stamp is. I have a feeling I should know, but I don’t. I am pretty sure it isn’t an orange flower, but I really wanted it to be orange, and that is the power of stamping, you can really do as you please.

I stamped three flowers and colored them with alcohol markers. I fussy cut them out, but I really didn’t feel I needed to be too careful with it. I then added a bunch of glitter glue to the flower. It looks so pretty when it dries down on the orange.
I did a simple arrangement for the flowers over an oval die cut and then added a sentiment strip and die cut butterfly to ground the card together. The background is a gelli print I had in my stash. It as made with an embossing folder for the design.

This flower stamp is so affordable and so pretty!
It is called Flower on Stem at the Blank Page Muse shop.
The sentiment was taken from a large sentiment set called Everyday Phrases, and this one is at the I Brake for Stamps shop.
If you know the flower, or think you might, please comment! It is one of the things that drives me nuts!
Thanks for visiting today!
You can also find more inspiration at the links below:
The Blank Page Muse- https://blankpagemuse.com/
FB Fan Page- https://www.facebook.com/groups/blankpagemuse/
Instagram Shop- https://www.instagram.com/blankpagemuse/
Instagram Blog- https://www.instagram.com/blankpagemuseblog/
Twitter- https://twitter.com/BlankPageMuse
Hello from design team member, Heidi. Today I have a pretty thank you card to share. I like to have a lot of these around because I tend to need a lot at once.

I stamped and colored two of the Rose images and colored them in. This is such a detailed stamp that it was very easy to color. I fussy cut them out.
I, then, stamped the Thank You onto some patterned paper. I also cut an oval window out of white cardstock and embossed it.
After this all there was left is to assemble the card by using a bit of bright pink cardstock for a mat. I thought about adding glitter, but in the end left it alone.
The stamps I used are both in the Blank Page Muse shop:
Rose flower with leaves by Terry Sproul
Fancy Thank You stamp (my favorite thank you stamp!)
Coupon code BPMHeidi
The embossing folder is Simon Says Stamp. The 6x6 Patterned paper pack is called Aquarelle.
You can also find more inspiration at the links below:
The Blank Page Muse- https://blankpagemuse.com/
FB Fan Page- https://www.facebook.com/groups/blankpagemuse/
Instagram Shop- https://www.instagram.com/blankpagemuse/
Instagram Blog- https://www.instagram.com/blankpagemuseblog/
Twitter- https://twitter.com/BlankPageMuse
Hello! Welcome to a new installment of my Cleaning My Craft Desk series!
Believe it or not, the ducks were colored and die cut, the water was already die cut from a distress oxide background, the patterned paper was already trimmed out to card size. All I needed to do was stamp and die cut the sentiment, and arrange the card.
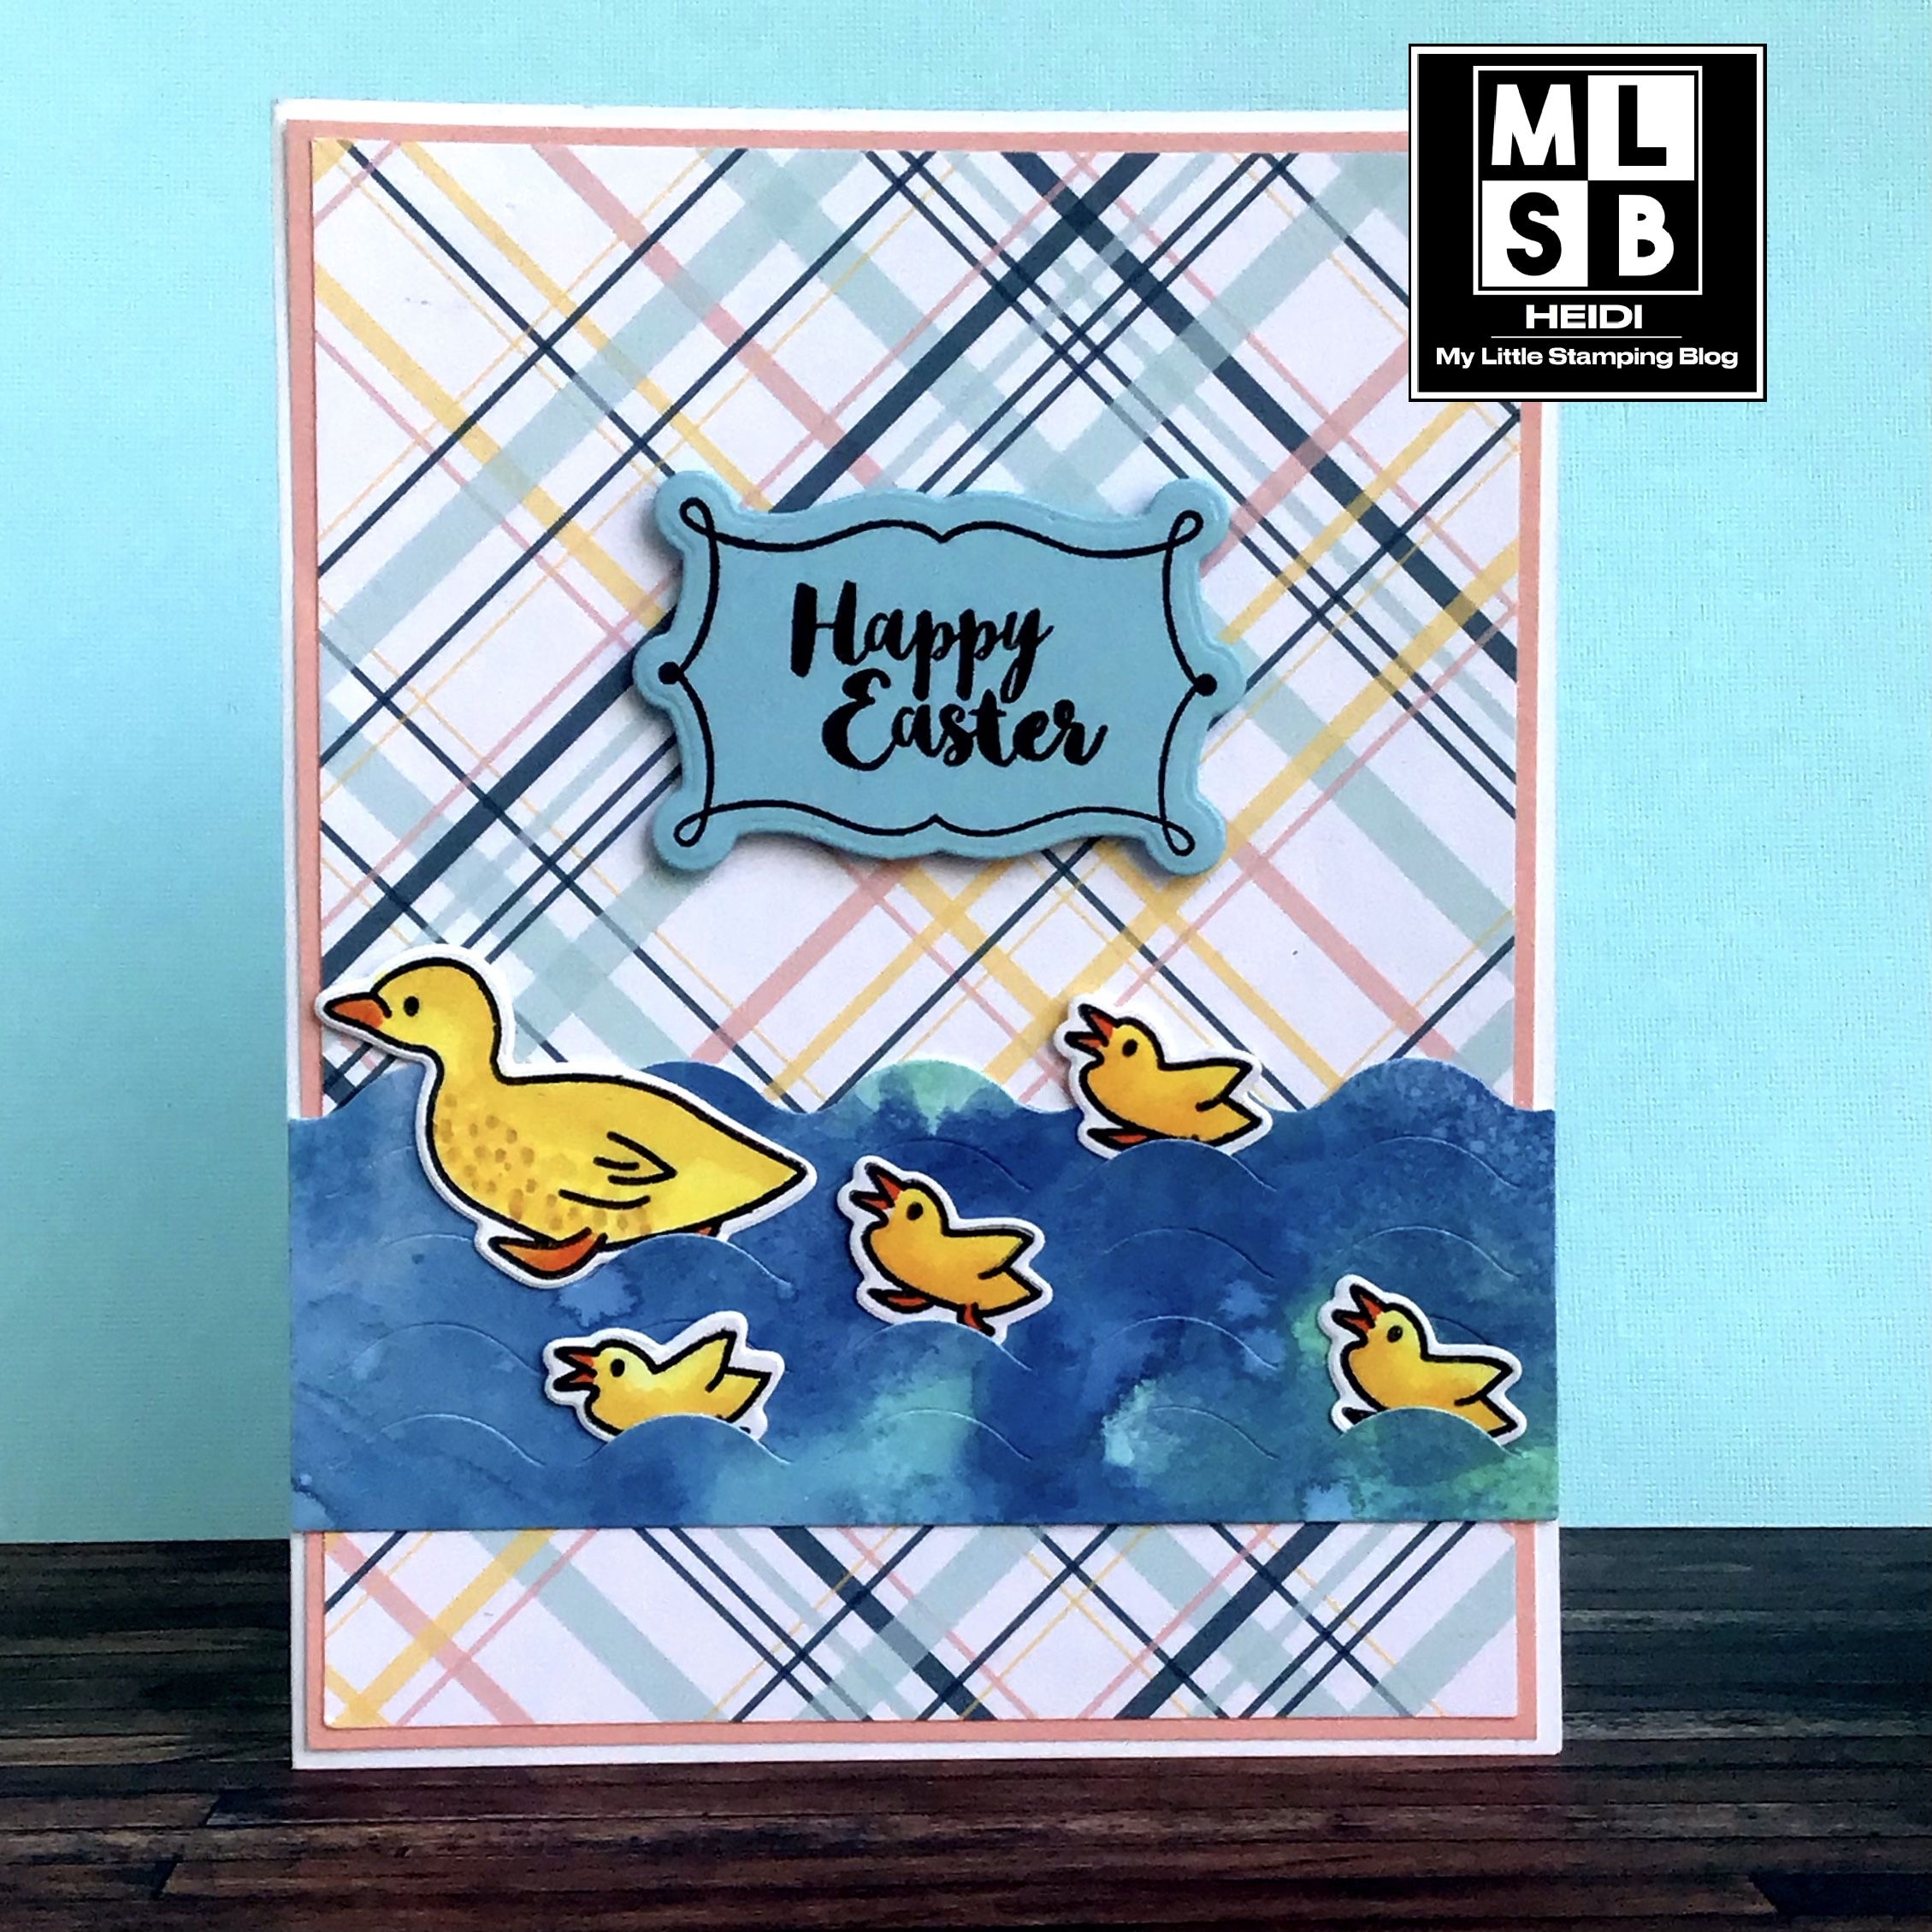
And there! I cleaned up part of my craft desk!
I actually think I cut and colored those ducks when this Hero Arts kit came out. Which was March 2017.
The other stamps I used here are Art Impressions Sweet Easter set, and Close to My Heart Daisy Meadows.
Have you cleaned your craft desk lately?
I have been working to clean off my craft desk again. You know how this happens, you see something and have to work on it. In my case, a lot of what is on my desk is partially finished, even to the point of being 75% finished. Or, you have stamps out on your desk you just have to work with.
So this is my new blog series, what I made when cleaning my craft desk…
This is a super cute and simple card.

I cut the heart from the patterned paper and then just flipped it over to the other side to get the tree print. I popped it up instead of inlaying it. I LOVE this burrowing owl image! They have so much personality. I just used Versafine Ink cubes to ink them up in two colors and then added a touch more color with markers.
Technique Junkies Owl stamp
Echo Park Happy Camper 6x6 paper pad
