Friday, July 31, 2020

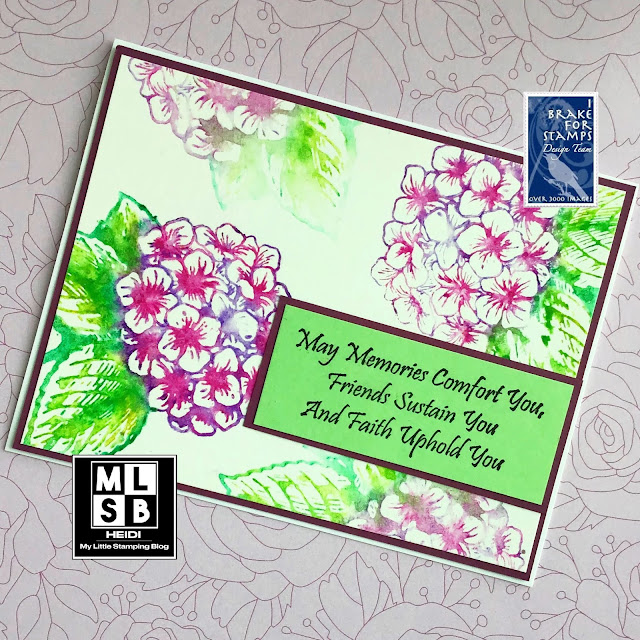
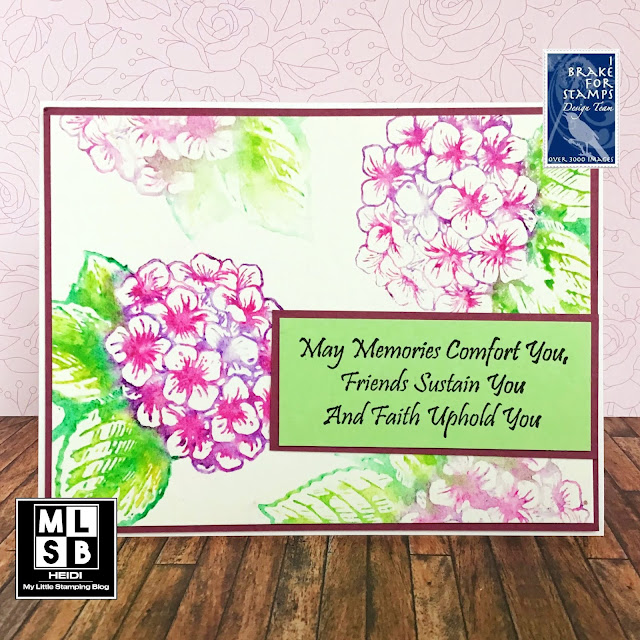
Hydrangea Sympathy

Hello everyone and Happy Friday!  

Renee shared a gorgeous card the other day using this same hydrangea stamp.  Great minds must think alike, or maybe we both have been admiring the pretty hydrangeas in so many people’s yards this time of year. 


I used Prima Watersoluble Oil Pastels to stamp this card.  You just color the crayon right on the stamp, spritz with water, and stamp.  I continued spritzing with water and stamping out more generations without applying more color.  I did use watercolor paper. 

I stamped my sentiment on light green and did the matting in plum cardstock.  

The stamps I used today can be found in the store here:  Half Sheet 137A, and Memories Comfort You. (Save 10% on your order with my code SAVE10HEIDI)


Thank you for visiting today!  Have a good day and keep on stamping!


Thursday, July 30, 2020

No Christmas Stamps - Christmas Card

Hello all! I am sharing some cards today that have been in the works for months!  I picked up these cute little stocking embellishments at Michaels in the wintertime, and knew they would work with some non-Christmas critter stamps to transform them.  

I stamped out the images, probably in April, but didn’t get around to coloring, die cutting and arranging them all till this week.  


I just love how they turned out!  This style of illustration that Hero Arts does (I wish they would tell us who their illustrators are, but I guess that is a mystery), and then I added an OLD frame stamp and an even older sentiment.  Patterned paper for the wallpaper and floor, and voila!

Hero Arts Welcome Home stamps, Recollections Cameo Stamp set, unbranded sentiment.  Recollections Christmas plaid papers and other paper scraps.  Jolie’s Stocking stickers.

I would love to enter Rudolph Days for July and SimonSaysStamp’s Wednesday challenge - Anything Goes.


I have actually made several more cards this week, so I will be back soon! Thank you for visiting!  I appreciate all your encouragement!

Christmas Card Goal to date: 35
Christmas cards done to date: 27

Thursday, July 23, 2020

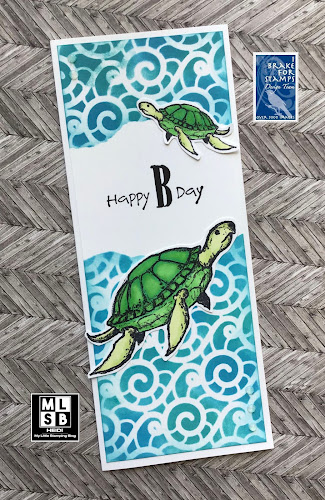
Slimline Turtles

Hello!  Things are a bit busy the last couple weeks and I have not been blogging as much as I would like. I do have several Christmas cards in the works, but they are not ready to share yet.  

Slimline cards are something that a lot of people are trying now.  I thought I would join the bandwagon.  They can be a variety of sizes, mine fits in a business envelope and is 3.5 inches by 8.5 inches. 


I like this size to send money or a check, and I like it because I can fit a bit more on it.  It would have been hard to fit both turtles on an A2 card.

My background is a stencil technique with Distress Oxide inks in Salty Ocean and Peacock Feathers. You can see a quick tutorial for this here. The stencil is from A Colorful Life Designs.

These stamps are from the I Brake for Stamps By the Sea stamp set.  (As always, save 10% on your order with my code SAVE10HEIDI)

Hope you are having a good day! Keep on stamping! 


Wednesday, July 15, 2020

Cat Collage Thank You Card

Hello!  I made a simple and lovely Thank You notecard using I Brake for Stamps Cat Collage.


I found this stamp worked best with pigment ink, and I used a dark brown color.  I gave it a few minutes to dry and then used some chalks to add color.  

To finish off the card, I just used a frame die cut, matted with plum and kraft cardstock. I stamped the tiny Thank You sentiment in the corner. It is from this Florals Sheet set.

Thanks for reading along and keep on stamping!

Saturday, July 11, 2020

Torn Paper Stenciling - Christmas Card

Hello! How is it going in your area? It was a wash out yesterday but is sunny and hot today. 


My card again uses the Torn Paper Stenciling Technique I shared earlier this week.  I used Distress Oxide inks in Tumbled Glass and Shaded Lilac for the stenciling, and then used the Tumbled Glass lightly around the edges of the stenciling.  Stamps are Gina K.  

There is wink of Stella on the snowman that isn’t visible in the photo.  

Have a good weekend!

Christmas card Goal to date: 35
Christmas cards done to date: 23

Wednesday, July 8, 2020

Brusho Floral “Two for One” cards

Hello!  I recently tried a technique for making two cards using one panel and I wanted to share this with you.  You can see Jennifer McGuire’s original idea in this video, but I know many people prefer to quickly browse a photo tutorial, so I am adding a tutorial on how I made these specific cards.


First, I stamped the Dahlia onto some Brusho backgrounds. I was able to stamp one and a half flowers on each background, the colors were Yellow Ochre, Rose Red and Terra-cotta.  I trimmed these out.  


Then, I used a sheet of cardstock 5.25 inches by 8.5 inches, marking the halfway point with a pencil line.


I dry fit my flowers in a way I thought might look good.


I also used a sheet of paper to look how each half of the card looked on its own.  


Then I glued down all the flowers and cut the panel in half.  My guillotine trimmer cut through all the layers easily.  


I finished the cards off with a heat embossed sentiment from the same set on a die cut label.  I also added some black Nuvo drops.  I could have used the background in any orientation, but I kept them the same as they were originally.  (You might have noticed, on the left card, I added an extra little scrap of a flower to fill it out.)


I also wanted to show you how I finished off the inside of the Thinking of You card with the Memories Comforts You stamp.  This is my favorite sympathy sentiment.  


As always, if you are shopping at the I Brake for Stamps store, use my code SAVE10HEIDI to save 10% off your entire order. 

Thanks for visiting today!  Have a great day and keep on stamping!
Monday, July 6, 2020

Torn Paper Stencil Technique Tutorial

Hello!  I have been having fun using stencils and thought of trying a technique with torn paper.  I hadn’t seen this done before, although it is pretty simple, I thought I would do a little picture tutorial.


1) I first tore some paper to cover part of my card front.  

2) I then taped my stencil over top of this.  

3) I used two colors of green ink to sponge over the stencil. I think two colors adds depth.  

4) I then carefully removed my stencil.  I think this next step is really important.  I used a light touch with my sponge and applied ink to the top and bottom of my paper mask and to the edges of the cardstock.   

5) I removed the paper mask.  This leaves a great spot for stamping a message or image.  

I hope you enjoyed the tutorial.  I finished my card off very simply with a sentiment from I Brake for Stamps and the flower from Sparkle n Sprinkle. I may go back and add a few enamel dots to it.  

Thanks for visiting today!  Please let me know if you try this technique!

Sunday, July 5, 2020

Spotlighting a Split Image

Hello and I hope you had a good holiday!  A friend from my online stamping group challenged us to use a technique she called Split Image stamping.  It is a type of spotlighting.


I cut a rectangle about 2.25 x 3.5 inches (it is not exact) and temporarily adhered that over a card front.  I then used my stamp platform to stamp the sunflower over top. I didn’t reink, but I did stamp several times to get a good image at the edge of that panel.  

I then colored just the smaller panel, matted that in green and adhered directly to the card front.  

This is a really pretty set from Power Poppy In Praise of Sunflowers and I hadn’t used the images yet.  And so many cute and different sentiments.  I know I am at a point in stamping that I do like sentiments that are a bit unusual.

I’d love to enter Word Art Wednesday’s Anything Goes challenge.

Thursday, July 2, 2020

Camping Card with Brusho Background

Hello!  I was feeling sad recently that I won’t be sending any camp cards this year, because all sleep away camps are cancelled this summer.  (There are a couple virtual activities we are doing, which I applaud all these creative folks for trying!)

So I decided to make a camping card anyhow.  


I had this scrap of watercolor cardstock where I had tested some Brusho.  It has been sitting on my desk for a while, as I knew I would use it or something.  Well today was the day!  

I colored my tent and raccoon with markers. I then paper pieced the sun. (All Purple Onion Designs.)  I had this saying (Power Poppy) that I thought would be good for any kind of summer greeting.  I put the whole thing over top of patterned paper from Pink Paislee Outfitters.


I would love to enter Cute Card Thursday’s Anything Goes challenge, and SimonSaysStamp’s Wednesday Bright and Cheerful Challenge..

Thanks for reading my blog today. I hope you are safe and keep on stamping!