Wednesday, March 27, 2019

Iris Flower Handmade Card

Hello stamping friends!  My iris flowers are just starting to grow in my front garden bed, and it inspired me to use this Iris Stamp!


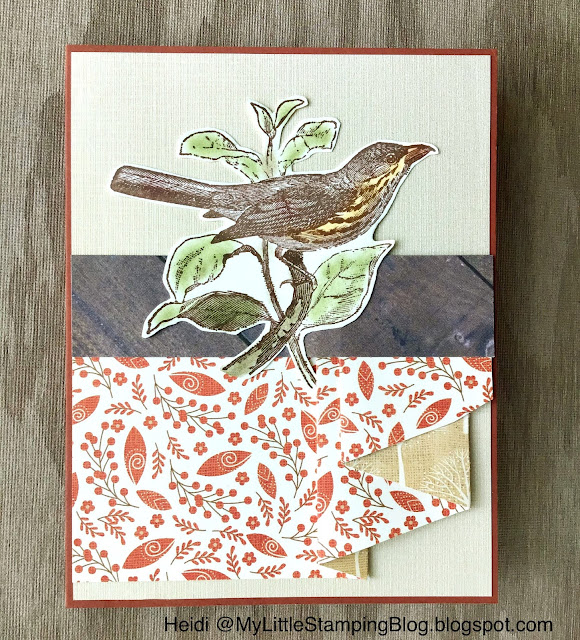
I colored the image with alcohol markers, then completely fussy cut it out with scissors and a craft knife.  I glued the base of the stem with wet glue, directly to the paper, then used foam squares under the flowers to add dimension.

The background circle is also stamped, and is a cut out from a previous I Brake for Stamps project where I created a frame.

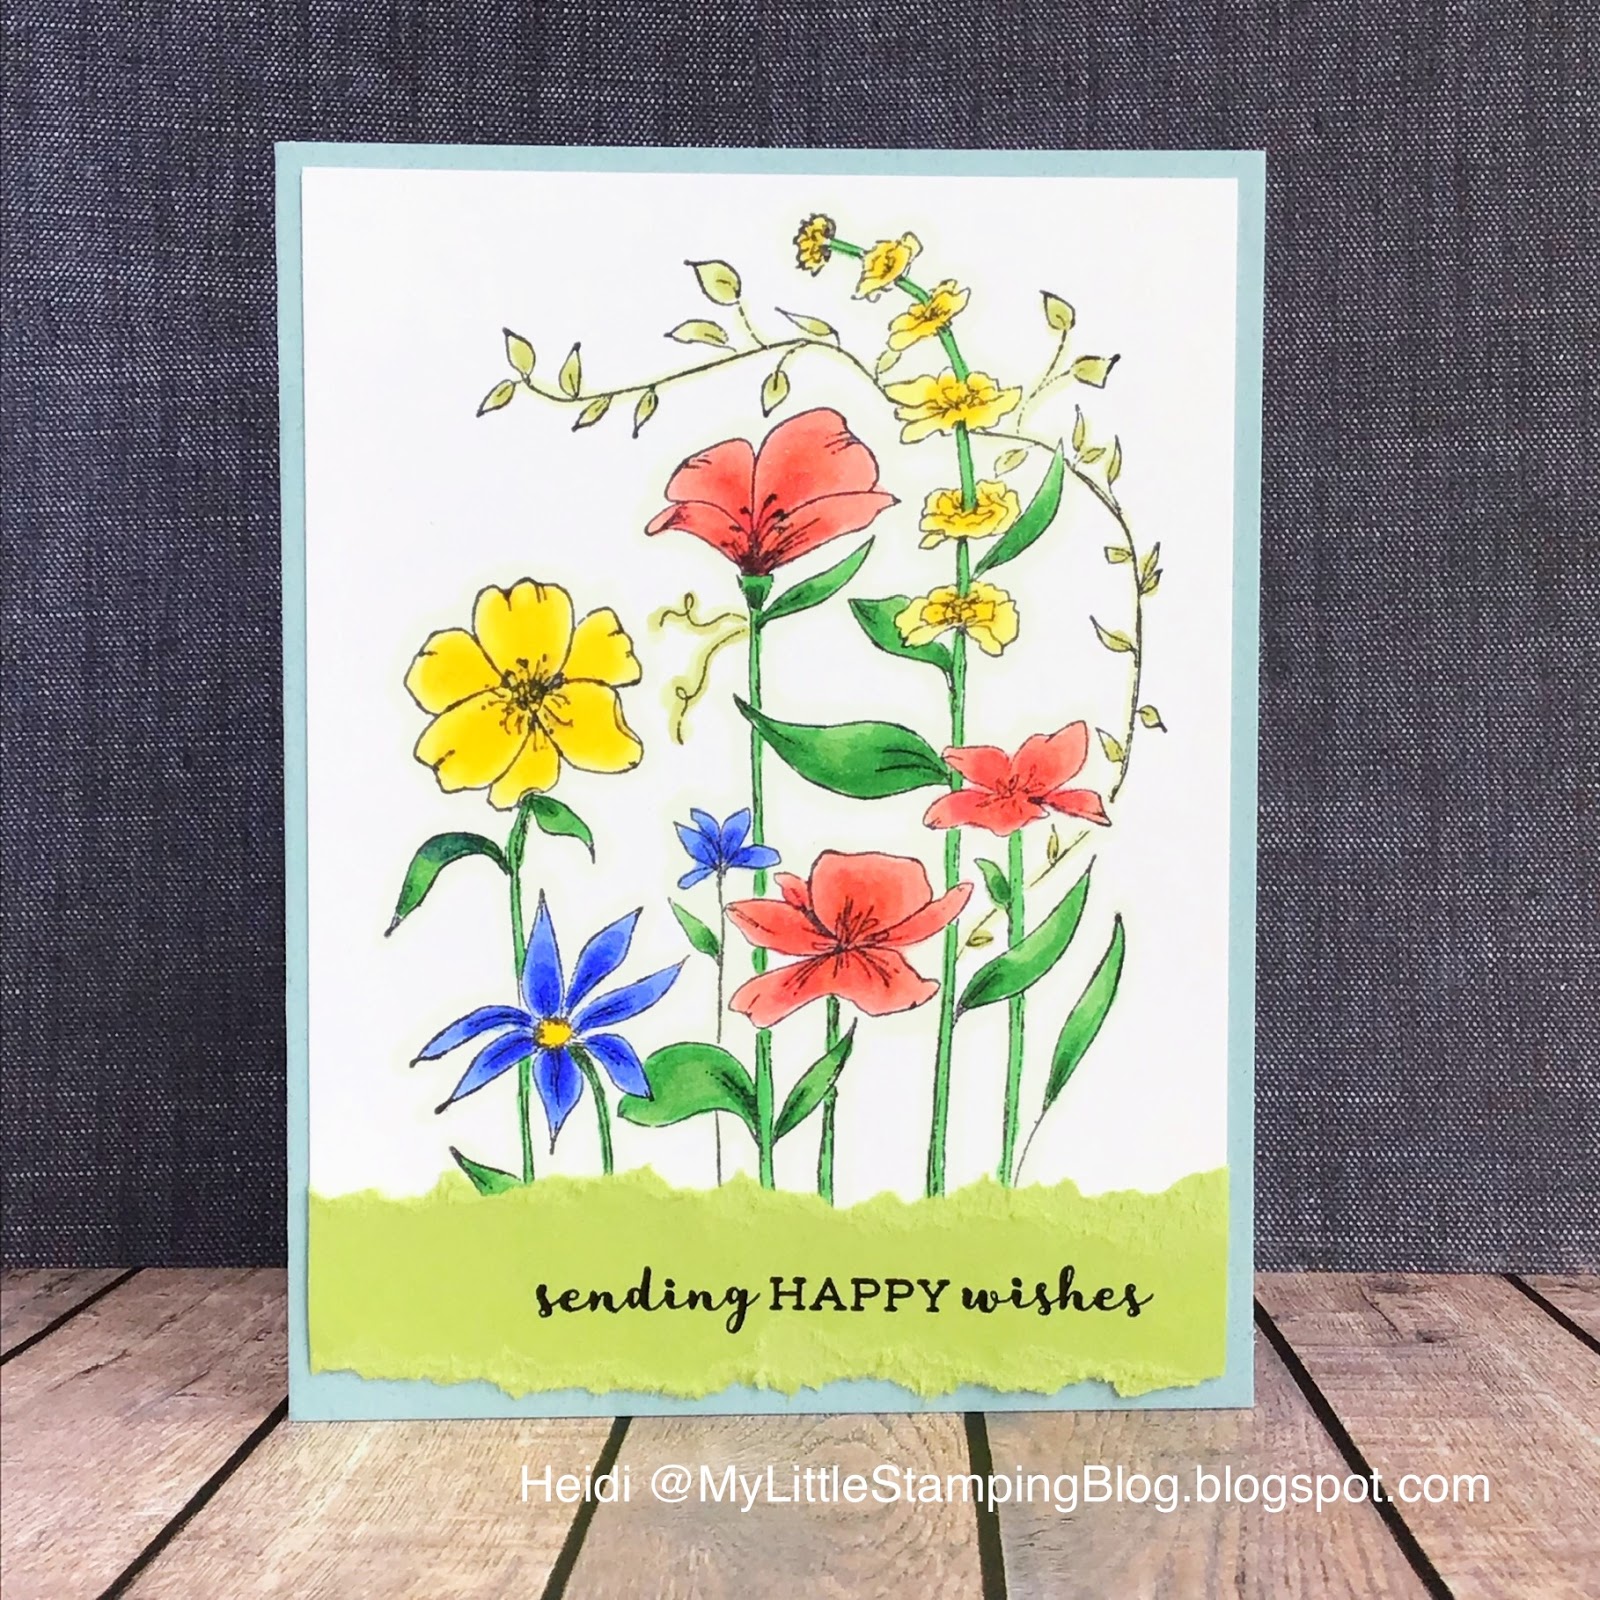
I’m not ready to send this card yet, so I left the sentiment off. However there is a space right at the base of the flower where I will add it when the time comes.  

Supplies: I Brake for Stamps Floral Half SheetIron Work Background, Memento Black ink, Spectrum Noir alcohol markers, Hero Arts Navy shadow ink, Darice Embossing Folder, Gina Marie X Stitched Circles die.
You can save 10% off your entire order at I Brake for Stamps using my coupon code SAVE10HEIDI.  

I would like to enter Cupcake Inspirations Color Challenge: 


Thank you for visiting today! Happy Stamping!

Monday, March 25, 2019

Blue Poppy Card with Hand-stamped acetate embellishments

Hello!  This is a card that was inspired by two different things.  First, I signed up for a swap where one needed to make stamped embellishments with acetate.  The second was a gorgeous blue poppy flower that I saw at the greenhouse portion of a garden estate.  It was a showstopper plant and my absolute favorite flower I saw that day.   I snapped this picture with my phone.


I decided to use this poppy stamp by Our Daily Bread Designs (they just recently rebranded themselves as Divinity Designs), so I decided to limit myself to using only stamps from this brand, just to narrow my choices.  I find that makes creating easier, sometimes.  I stamped on watercolor paper and used watercolor markers to color.  


For the acetate embellishment, I stamped the bees, cut them out and colored with both some alcohol markers and then stickles glitter glue.  After stamping the honeycomb twice on the card front, I arranged my flower, bees and a banner die cut.  I was pretty pleased with how it turned out!


Supplies: Our Daily Bread Designs Crocheted Poppy and die, Pennant Banner set, Butterfly and bugs stamp set, watercolor paper, Tombow Water Based markers, stickles glitter glue, other items from my stash.  

I would love to enter ModSquad Blog’s Use a Metal Die challenge, Lost Coast Portal to Creativity’s, Round & Round challenge, and Cute Card Thursday’s Spring Fever Challenge.

Thank you for your visit today!  Please consider subscribing to my blog or leaving a comment to let me know you were here!  Have a great day!

Saturday, March 23, 2019

Floral Silhoueutte - One Stamp, Three Ways

Hello and Happy Weekend!  Today, I would like to share three cards I made with the same stamp.

First, I stamped the image over top of a Alcohol Ink Polished Stone background that I did on Yupo paper.  


Second, I used this stamp as my background.  I stamped in a light pool colored ink, then stamped my girl silhouette over top.  Very springy!


Third, I did some watercolor stamping.  To get this look, use water-based markers to ink up your stamp, spritz with water, and then stamp onto watercolor paper.  


Which one do you like best?  

All Stamps from Just for Fun: Floral Silhouette,  Rainy Walk in the WildflowersHappy Mother’s DaySentiment Sheet 3

I would love to enter Crafting By Designs Blooming Flowers challenge, ModSquad Challenge - Use One or More Metal dies (all three cards used a die, Avery Elle Wonky Stitched Rectangle and Gina K/Thermoweb Nested Rectangles)


Wednesday, March 20, 2019

Happy Easter Eggs - Making Multiples

Hello!!  I need to make quite a few Easter cards this year, as my stamping group is sending cards to residents at an assisted living center.  So, I decided to make it easier and make some multiples. Same, but different.


I started by choosing three scraps of patterned paper.  I stamped my Easter eggs on each and trimmed them out.

Then, I stamped the eggs and sentiment onto colored cardstock and die cut them different ways.  I paper pieced in the patterned eggs and added stickles glitter glue as an accent.  I finished the cards by doing some simple layouts using all pastel colors, and some embossing folders, too.


Supplies: I Brake for Stamps Happy Easter Eggs Stamp, Versafine Black ink, Elizabeth Crafts and Sizzix Embossing folders, Ribbons and patterned papers from my stash, Spellbinders Fancy Edge Rectangle dies, Avery Elle Wonky Stitched Rectangle dies.
Save 10% on your order at I Brake for Stamps with my coupon code SAVE10HEIDI..

I’d love to play in Pixie’s Crafty Workshop Snippets Challenge, and Crafty Hazelnut’s Patterned Paper challenge for March

Thanks for visiting today!

Tuesday, March 19, 2019

Colorblock Background - Color Bleed Grid Technique

Hello and hope you are well today.  I was looking through my Pinterest the other day, and decided to go back and look at some of the very first things I pinned.  Well, I found SEVERAL techniques I never did try, so today I am trying one!  


This technique was at Ellen Hutson and is called the Color Bleed Grid Technique.  The tutorial is here.  Of course, I used my Spectrum Noir markers, as any alcohol marker will work.  Also, at the point where I was supposed to erase the pencil lines, I just turned my paper over and decided that side looked awesome too!  (No erasing needed. Am I lazy, or what!?)

I added some stenciling with Heidi Swapp Silver metallic paste to the card base.  

I also want to mention how awesome this silhouette stamp set is!  I adore that the boy who uses a wheelchair is playing with a boy who appears typical.  So glad to see a more inclusive world through stamps!  


For the inside of my card, I selectively stamped just the balloons from one of the stamps in blue. 

Supplies: Blue Knight Rubber Stamps Birthday Fun stamps set, Close to My Heart Epic Birthday Stamp set (sentiments), Versafine Onyx Black ink, Hero Arts Cornflower shadow ink, Plaid Distress Star stencil, Heidi Swapp Silver Metallic texture paste, other supplies from my stash. 

I would love to play along with Crafting By Designs Let’s Hear it for the Boys challenge, and Cute Card Thursday’s Celebrate Challenge.


Thank you SO MUCH for visiting today! I hope you will have time to leave a comment to let me know you were here.  And if you haven’t already subscribed to my blog, I would be so happy if you did!  Have a great day!

Monday, March 18, 2019

You Brighten My Day - Handmade card

Hello! Happy Monday! I hope you had a good weekend. Our weekend was very busy.  We visited a garden estate to walk around the grounds and see what they were displaying in the greenhouse. It was very lovely! Did you do anything special?


My card today is a technique I tried that I saw at SplitCoastStampers called Blender Pen Bleed. Basically, you use your layering stamp sets, then color from behind using an clear alcohol blending pen.  I’m not sure I got the whole effect, but it does soften the lines.  

I like the idea of this technique, as sometimes I feel I don’t line my stamps up well enough, and this can cover some mistakes, I think!

I did use a pink marker to accent the sentiment.

Supplies:  Kitchen Sink Stamps Zinnia, Close To My Heart Wordfetti sentiment stamp set, Mix of dye inks for flower (sorry didn’t write them down!) and Versafine Black ink, Spellbinders Fancy Edge Rectangle dies, Gina K Designs Passionate Pink cardstock, sequins from my stash.

I would love to play in the ModSquad Challenge Blog’s Layered Looks, and Word Art Wednesday’s Anything Goes challenge.

Sunday, March 17, 2019

Bad Luck!

Happy St Patrick’s Day!  I just sent out a few cards to select friends!  I hope they like this sentiment as much as I do!


Supplies:  Deep Red Rubber Stamps Superstitious, Memento Black ink, Avery Elle pigment inks, Hero Arts Tweed and Four Leaf Grid background stamps, Cuttlebug Swiss dots embossing folder, EK Success punch, other items from my stash.


Have a wonderful day!


Saturday, March 16, 2019

Have a Lucky Day!

I don’t make very many St Patrick’s day cards, but I did make a few this year.  This one is a Clean and Simple card.  Is it too clean?  


I would love to enter Simon Says Stamp’s Work it Wednesday Green & Gold, and Tuesday Throwdown’s Good Luck Challenge.

Thanks so much for visiting!

Friday, March 15, 2019

Here comes the Easter Bunny - handmade card

ETA 3/17/19: Thanks to Cupcake Inspirations for choosing my card as a favorite!

AND Thanks to Tuesday Morning Sketches for choosing this card as a favorite, too!
_________________________________________________


Happy Friday everyone!  Today I have a card that I made for a few challenges!  I sometimes write too much, I think, so today, just the card!!


Supplies: Art Impressions Sweet Easter stamp set, Memento and Versafine Black inks, Spectrum Noir alcohol markers, EK Success edge punch,  American Crafts Everyday 6x6 paper pad, other supplies from my stash.

I would love to enter these challenges:
Word Art Wednesday- Anything Goes
Art Impressions - Cutting Edge


I really appreciate your visiting my blog today!!!

Thursday, March 14, 2019

Sending Happy Wishes - handmade floral card

Hello!  Today is a glorious and sunny day!  Tomorrow we should get bad weather from that “bomb cyclone” weather system.  What an awful name for it!  Too dramatic for me.

Anyhow!  Today I created with a stamp I won from the new release from Blue Knight Rubber Stamps.  They are a newer company, and although I saw them last year at the stamp show, I don’t think I shared any cards from the stamp I purchased. (I think I was in a hurry to get those cards sent ASAP.  Do you post every card you make?  I post a lot, but not all.)


I colored this in springy colors. I especially like that little vine that meanders through.  Next time I color this, I think I am going to color that in the darker green to draw more attention to it.  I picked out a scrap of cardstock for my sentiment, then tore the edges off to make it look a bit organic.  

Supplies: Blue Knight Rubber Stamps Wild Flowers, Power Poppy Natural Beauties stamp set (sentiment), Memento and Versfine Black inks, Spectrum Noir alcohol markers, cardstock from my stash.

I would love to play in SimonSaysStamp’s Monday Challenge - Feminine cards, and Word Art Wednesday’s Anything Goes challenge.

Thanks for visiting today!  

Wednesday, March 13, 2019

Spring Corner Bouquet - Handmade Easter Card

Hello!  I feel like we really turned the corner toward Spring now!  Maybe it was the time change?  It has been sunny for a couple days, although still pretty cold.  I do have Spring bulbs trying to grow.  It won’t be long now!


I colored this image with alcohol markers.  When it was first stamped, it would be easy to be intimidated and think it was too complicated of an image to color.  However, I just took it in steps, coloring just one flower type at a time.  That made the work so much faster and it was really enjoyable to color this!


Since I was coloring one, why not make two?  That way, I got to try more color combinations.  


Supplies: I Brake for Stamps Spring Bouquet Corner stamp, Happy Easter Eggs stamp, Memento and Versafine Black inks, Spectrum Noir alcohol markers, cardstock from my stash.  
Use my coupon code SAVE10HEIDI to save 10% off your order at the I Brake for Stamps store.


Thanks for your visit!  Come again soon!


Tuesday, March 12, 2019

Some Bunny Loves You - Handmade Easter Card

Hello everyone!  This past weekend, I had the chance to work at a Stamping  Show.  I did the make n takes for Just for Fun, and it was a really great experience.  I enjoyed meeting different people, and chatting about what we like to make.  (It was also a little fun to get a behind-the-scenes look!)

  I highly recommend going to any of the Stamping Conventions/Shows that are remotely near you.  It is just a special treat to be able to see the demos, and try some of the products before you buy, or maybe find a new favorite company that you might not have seen otherwise!  I have never set foot in a stamping store, as they have mostly all closed, so supporting this kind of show is important if we want to maintain the diversity in the papercrafting world.

___________________________

Also I had fun coloring this super cute Easter image this morning.  I did just a bit of masking to add the eggs in front of the flower pot.  I especially like that the sentiment  that came with it is typed, easier for the little ones to read.


Supplies: Art Impressions Sweet Easter stamp set, Memento and Versafine Black inks, Spectrum Noir alcohol markers, Die Namics Pierce Square dies, EK Success Square punch.

I would love to enter Art Impressions Challenge #251 - Floral Cards and WordArtWednesday’s Anything Goes.

Thanks, as always, for your visit! If you aren’t already a follower, I hope you will consider it!  I am always trying to find ways to comment back, so I hope your profile is linked to your blog. 

Sunday, March 10, 2019

Dangler Card Fold Tutorial - Heard you Caught a Bug!

Hello!  Just for Fun’s Monthly challenge for March is a really fun one!  You are to incorporate some feature in your card that has movement.  Lots of fun inspiration from the design team this month.

https://justforfunrubberstamps.blogspot.com/2019/03/jff-march-2019-theme-challenge-marie.html

For my card, I decided to do a fancy card fold called the Dangler.  It is not very well known at all, but it is very easy! (Now, that’s my kind of fancy fold!!!)  I included a short picture tutorial for you. First here is my card.


Cute, right?  Let me show you how easy it is.

You can click on any of the photos to take a closer look.

First you need a strip of cardstock that is 8.5 inches long.  The one I have shown is 1.5 inches wide, but that can vary according to your preferences.  I just wouldn’t make it too thin, as it will be holding your dangled items.


Score at 2 1/8 inch, 4 1/4 inch and 6 3/8 inches.  I marked mine with pencil to be sure they photographed well, but of course you will just score.

Fold your strip like the shape of the letter W. 


At this point, create your danglers.  You need to stamp two small images, and then sandwhich them around some twine.  You can cut them out with scissors, or use a little circle die. I like to use liquid glue and then set an acrylic block on top as it dries.  (But use whatever strong adhesive you like.)


Use scotch tape to hang the dangler anywhere you choose on the inside two rectangles of your cardstock. Use your bone folder or fingernail to press the tape down firmly.   This is optional, but you could add another piece of cardstock over top of this section to make it look very neat. But this part will be mostly hidden.


Then, you just apply this to the inside of your completed A2 size card, as shown, at the top edge of the card.  Apply glue just to the outside of the W, where it is to make contact with the card base.


This is what the card looks like from the top.  It does fold flat enough for mailing.


Decorate the inside of your card however you like.


I would love to play in these challenges:
Word Art Wednesday Anything Goes
Tuesday Throwdown Interactive Cards

I hope you enjoyed this tutorial and that you will give it a try. I truly get confused with many of the fancy card folds, but this one was easy for me.  


Thanks for coming by!  Please consider following my blog, if you don’t already do so!


Friday, March 8, 2019

Christmas Cat Card

Hello!  I am pushing right along with my 2019 Christmas cards.  Here is one more!


I colored the image with alcohol markers and then added stickles to the ornament.  I used a sketch for the card layout, using an embossing folder for the black layer.  I also decorated the inside of the card with a coordinating cat and a funny sentiment.  This sentiment may not be for everyone, but for a cat owner who has owned animals that climb the tree and knock off ornaments, I think this will be a hit!


Supplies:  Newton’s Nook Ornamental Newton, Newton’s Antics, Elle’s Studio Cheers sentiment stamp set, Elizabeth Crafts Holiday Cheer sentiment stamp set, Memento and Versafine black inks, Heidi Swapp patterned paper, Sizziz Snowflake embossing folder, Stickles glitter glue.

I would love to enter the Inky Paws Sketch Challenge, Cute Card Thursday Anything Goes and the Cupcake Inspirations Challenge - Plaid.


I appreciate your visit so much!  Come again soon!

Wednesday, March 6, 2019

Hand Stamped Bird card with the Drapery Fold

Hello everyone!  It is very cold this morning, but I want you to know that as I was walking in from taking my child to carpool, I heard the birds singing their SPRING songs.  Not just chirping like they do all winter, this was the actual defending their territory song. YAY!  Spring is coming!

Bird stamps are some of my favorite stamps, as I might be a bird nerd, and this stamp is no exception!

I stamped the bird with brown ink and colored it lightly with chalk pastels.  This may be an “old” way of coloring, but it is still really effective, not to mention, fast and easy!  I then fussy cut out the bird.  


I used the drapery fold again for this card.  You may remember the Valentines I made earlier. You can find instructions on how to do this here, although there are a lot of different ways to do this.  I love the elegant look.  

I then used some scraps of the same pattered paper, and a couple small stamps from the same set, and decorated the inside of my card.  I don’t have a formal blog challenge for myself this year, but I have been trying to decorate the insides of cards!  I am not doing every card, but I have been able to do quite a few!


Supplies: I Brake for Stamps Bird Sheet 141A, Gina K Designs Dark Chocolate ink, Hero Arts Soft Sand Shadow Ink, Close to My Heart paper, other items from my stash.
Use my code SAVE10HEIDI to save 10% off your order at the I Brake for Stamps store.

Thank you for your kind visit and all your encouraging comments!