Showing posts with label dies. Show all posts

Friday, July 19, 2024

Tropical Flamingo Card

 Just stopping in to share this card. I really like it!


Spellbinders Embossing Folder

Taylored Expressions Sentiment

Gina Marie Stitched circle die

Creative Expressions Flamingos

Hero Arts Layering Stamp and Dies


Thanks for looking!

Monday, April 3, 2023

Spring Bird House Card with Ephemera and Stamps

 Hello and Happy Monday!  Spring has definitely sprung so it is time for a bird card!

This was for another challenge in my Artsy Inkers online group where we needed to use three different embellishments.  That was a little hard for me but I did come up with this.


This uses Stampin Up Birds and Branches stamps and dies.  K&Company Antique Garden 6x8 patterned paper pad and Ephemera pack.

Hope you are having a good day! Thank you for visiting and all your kind comments. 

Saturday, March 18, 2023

Frilly Flowers Notecard

 Hello from design team member, Heidi.  Today, I could use your help. I don’t know what this flower stamp is.  I have a feeling I should know, but I don’t.  I am pretty sure it isn’t an orange flower, but I really wanted it to be orange, and that is the power of stamping, you can really do as you please. 


I stamped three flowers and colored them with alcohol markers. I fussy cut them out, but I really didn’t feel I needed to be too careful with it.  I then added a bunch of glitter glue to the flower.  It looks so pretty when it dries down on the orange.  

I did a simple arrangement for the flowers over an oval die cut and then added a sentiment strip and die cut butterfly to ground the card together.  The background is a gelli print I had in my stash.  It as made with an embossing folder for the design.


This flower stamp is so affordable and so pretty!  

It is called Flower on Stem at the Blank Page Muse shop.

The sentiment was taken from a large sentiment set called Everyday Phrases, and this one is at the I Brake for Stamps shop.

If you know the flower, or think you might, please comment!  It is one of the things that drives me nuts!

Thanks for visiting today!

You can also find more inspiration at the links below:

The Blank Page Muse- https://blankpagemuse.com/

FB Fan Page- https://www.facebook.com/groups/blankpagemuse/

Instagram Shop- https://www.instagram.com/blankpagemuse/

Instagram Blog- https://www.instagram.com/blankpagemuseblog/

Twitter- https://twitter.com/BlankPageMuse

Pintrest- https://www.pinterest.com/blankpagemuse/boards/

Sunday, May 15, 2022

Graduation Cards with Alcohol Inks on Yupo

 Hello!  My son is graduating from high school this year, so I made a couple cards since I know he will be attending some graduation parties of his friends.  


I made this alcohol ink background on yupo. I do not write down the colors, but I know I used at least one ink with shimmers.  Unfortunately, these were extremely hard to capture well on camera, so use your imagination!  They really look good!

I then used a NBUS die and NBUS stamp set, and an old glitter cardstock. In fact, I had to purchase these supplies because I really didn’t have anything for a graduation card!

I’m so pleased how these turned out.

Here are the supplies I used:

Impression Obsession DIE296-T - Grads Tossing

Taylor Ed Expressions stamp set - Grad Grumplings (sentiments)

DCWV Twinkle Glints stack paper pad


I would love to enter the SimonSaysStamp’s Monday Challenge - Alcohol, Drink or Ink.

And also entering the NBUS Challenge!


Thanks so much for visiting and for your kind comments!  I have now posted more blog posts in 2022 than I did in the entire year of 2021.  It looks like 2021 was not kind for many blogs, as I was just going through all the challenge blogs I used to keep track of and there are so many that aren’t operating anymore.  

Also, I hope to keep asking this, but if you have an Instagram, can you comment with your IG Handle, or find me heidi_mylittlestampingblog so I can follow you back!  I feel like missing most of 2021 made me miss a lot of people changing to IG.  Thanks!

Thursday, May 5, 2022

Patterned Paper Stashbuster Challenge - Post Two - Birthday cards

 Hello everyone. I am continuing to make good headway using up a pack of patterned paper.  

Let me back up a second.  I have a lot of 6x6 paper pads.  I had three that were similar colors, but all nearly used up so I had been keeping them together in one quart size ziplock bag.  So I basically took all of these and cut A2 cardfronts from any full pieces, and kept all the scraps, as well.  I am working on using up the entire thing as quickly as I can.  (If I ever figure out what the names of these pads are, I will add the info.  Two were from My Mind’s eye and one was Crate Paper??)

Why?  Just as a motivator as I love buying new paper, so it is good to clear some out.  The other thing I noticed is that I often keep the pieces I like best (because they are too pretty to cut up) and that is just silly!  

I am especially trying to rebuilt my birthday card stash!  When I have enough, I will be donating many to a local nursing home.  


This first card is pure silliness on my end. I had the images totally stamped and colored, even that strip of patterned paper was already attached. I just needed to add the sentiment and finish up the card.  


The second and third cards are fairly simple.  I went through my stamps and pulled out ones that I thought might possibly look nice with the paper.  It was a fun way to give new life to stamps I might not have used yet or hadn’t seen love in a long time!


I have more cards coming!  I bet I can make at least 15 cards from this paper.  With the two Mother’s Day cards I recently posted, and these, that makes 5 so far!  What are you working on lately? 


Here is a list of stamps I used:
I Brake for Stamps Mostly Mice (as always you can use my affiliate code BPMHeidi to save 15%)
Gina K Designs Birthday GoRound
Tim Holtz/Stampers Anonymous Birthday set (THMB012)
Unity Stamps Life’s Short Eat Cake! set

Thank you for visiting and have a good day!


Thursday, February 24, 2022

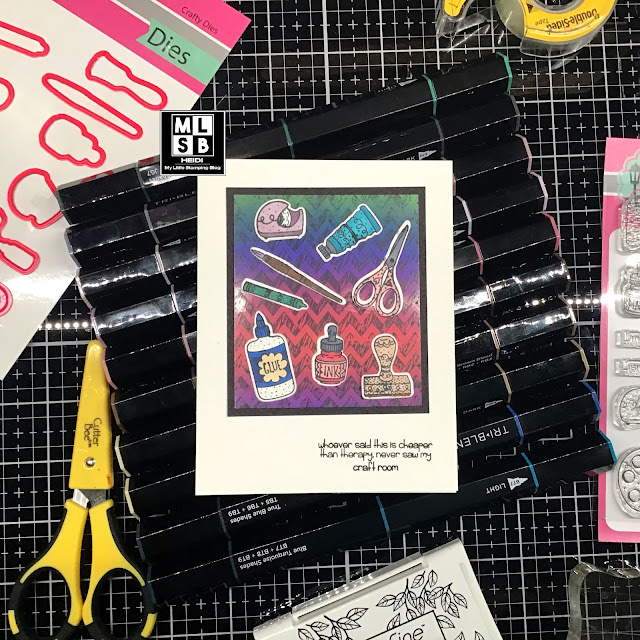
Cheaper than Therapy?

 Hello!  I am playing around with more new supplies!  And this one has a super funny sentiment, I think you will agree!

The background is glossy cardstock that I brayered over with a new Kaleidacolor inkpad. I heard that these are not being made anymore, so I bought 3 more!  They are so fun.  I then stamped over top of it with the chevron stamp (this stamp is very old, I think it was from A.C. Moore).  
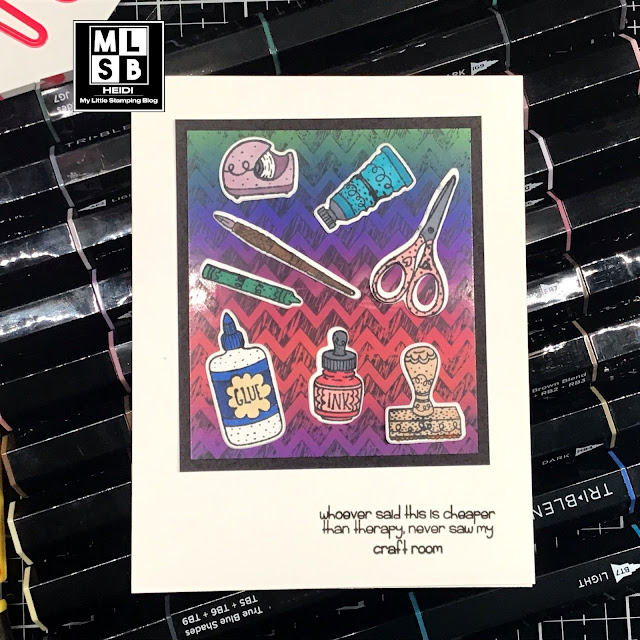

I then stamped, die cut and colored all these little crafty supplies.  These were also new.  I think this illustration style is so cute.  

I couldn’t resist photographing the card over all the supplies I used on the project, listed below:

Pink and Main Crafty Stamp set and dies

Kaleidacolor Spectrum Inkpad

Hot Fudge Studio (Cam and Chloe) Stamp PS0888 Chevron


Thanks for visiting!  I appreciate your visit and comments so much!

Thursday, February 10, 2022

Tiny Roses Valentine

 Hello again! I have a pretty Valentine to share today using a bunch of NBUS items.  

I just got this quilt die from Honey Bee. I love it, it is so cute, and they also had some matching stencils, so I used the heart one here with some pink Oxide ink.


I had a bunch of circles cut from glossy card, so I decided to use my peg stamps on it.  I used all dye inks and although you have to be a little careful when you are stamping (that your stamps don’t slide around) it is really worth it because the way the dye ink dries, you get natural depth to the stamping. I think you can see how the leaves are darker in the centers.  

The products I used:

Rubber Stamp Tapestry Secret Garden peg stamp set

Honey Bee stamps Quilted A2 Cover plate

Honey Bee stamps Quilted Hearts stencil

Sentiment from a Close to My Heart set


Thanks for stopping by today!

Sunday, February 6, 2022

Gnome Valentine

 Hello everyone. I hope you are staying warm!  It has been a cold winter here!

Hey, I am wondering what challenges everyone is interested in nowadays. I have been doing so little crafting lately that I am out of the loop.  I am totally back now so please drop me a comment if you want to recommend a Cardmaking challenge!

Onto my card, I am trying to work through a number of NBUS items. I probably purchased more stuff during the pandemic than I used.  One of them was this SUPER cute gnomie image from Stampendous.  I decided to color it some sortof vintage shades, which I think works well for Gnomes.  


I fussy cut this image out and put it over the die cut and stenciled background. I just recently purchased these from Honey Bee.  I hadn’t ever used anything from them but I was really happy with my purchase and have more to share in the future.  

Supplies:

Stampendous Gnome Love, Honey Bee Stamps Quilted A2 Cover plate, Honey Bee Quilted Hearts Stencil, Distress Oxide ink, Spectrum Noir markers.

Thank you for visiting!

Thursday, February 27, 2020

Christmas Cards with the Double Point Fancy Fold

I’m not much into making fancy folds, I frequently make mistakes in measuring, so it is actually a little bit odd that I fell so in love with this fold and made 6 cards!  

I first saw the fold last week on Carol’s blog here.  There are MULTIPLE video tutorials out there (one of which is here) and I found it impossible to figure out who the original designer was.  


As I was making one, I figured out that I could easily get 6 cards worth using just 2 sheets of 12x12 patterned paper, so that is what I did!

The hardest part was figuring out which focal point to use.  These sat on my desk for days before I decided on heat embossing the poinsettia on another coordinating patterned paper.  I was set on using some label dies for the focal points, mostly because I have only rarely used them in the past and I thought they looked nice.  


Anyhow, this was super fun for me, and if I am doing a fancy fold, you have got to know that it must be a pretty easy one!

I’d love to enter the February Rudolph Days challenge and SimonSaysStamp’s Wednesday Anything Goes challenge.


Cut directions for 6 cards from 2 pieces of 12x12 patterned paper:
1) Sheet one: Cut into three 4 inch by 12 inch pieces.  Take each of those and cut into four 4 by 3 inches pieces.  You will have 12 4x3 inch pieces.
2) Sheet 2.  Cut into three 4 inch by 12 inch pieces.  Take each of those and cut into 4 x 5.25 inch pieces.  You will get 6 of those and then an 3 little pieces of scraps.

You will also need a 4 1/8 by 5 3/8 matting for each card, a 4.5 by 5.5 card base, and whatever type of focal point you choose.  Follow the directions in the video tutorial I linked to above.

Thanks for visiting!!


Christmas Card 2020 goal to date: 10
Christmas cards made: 12

Friday, February 14, 2020

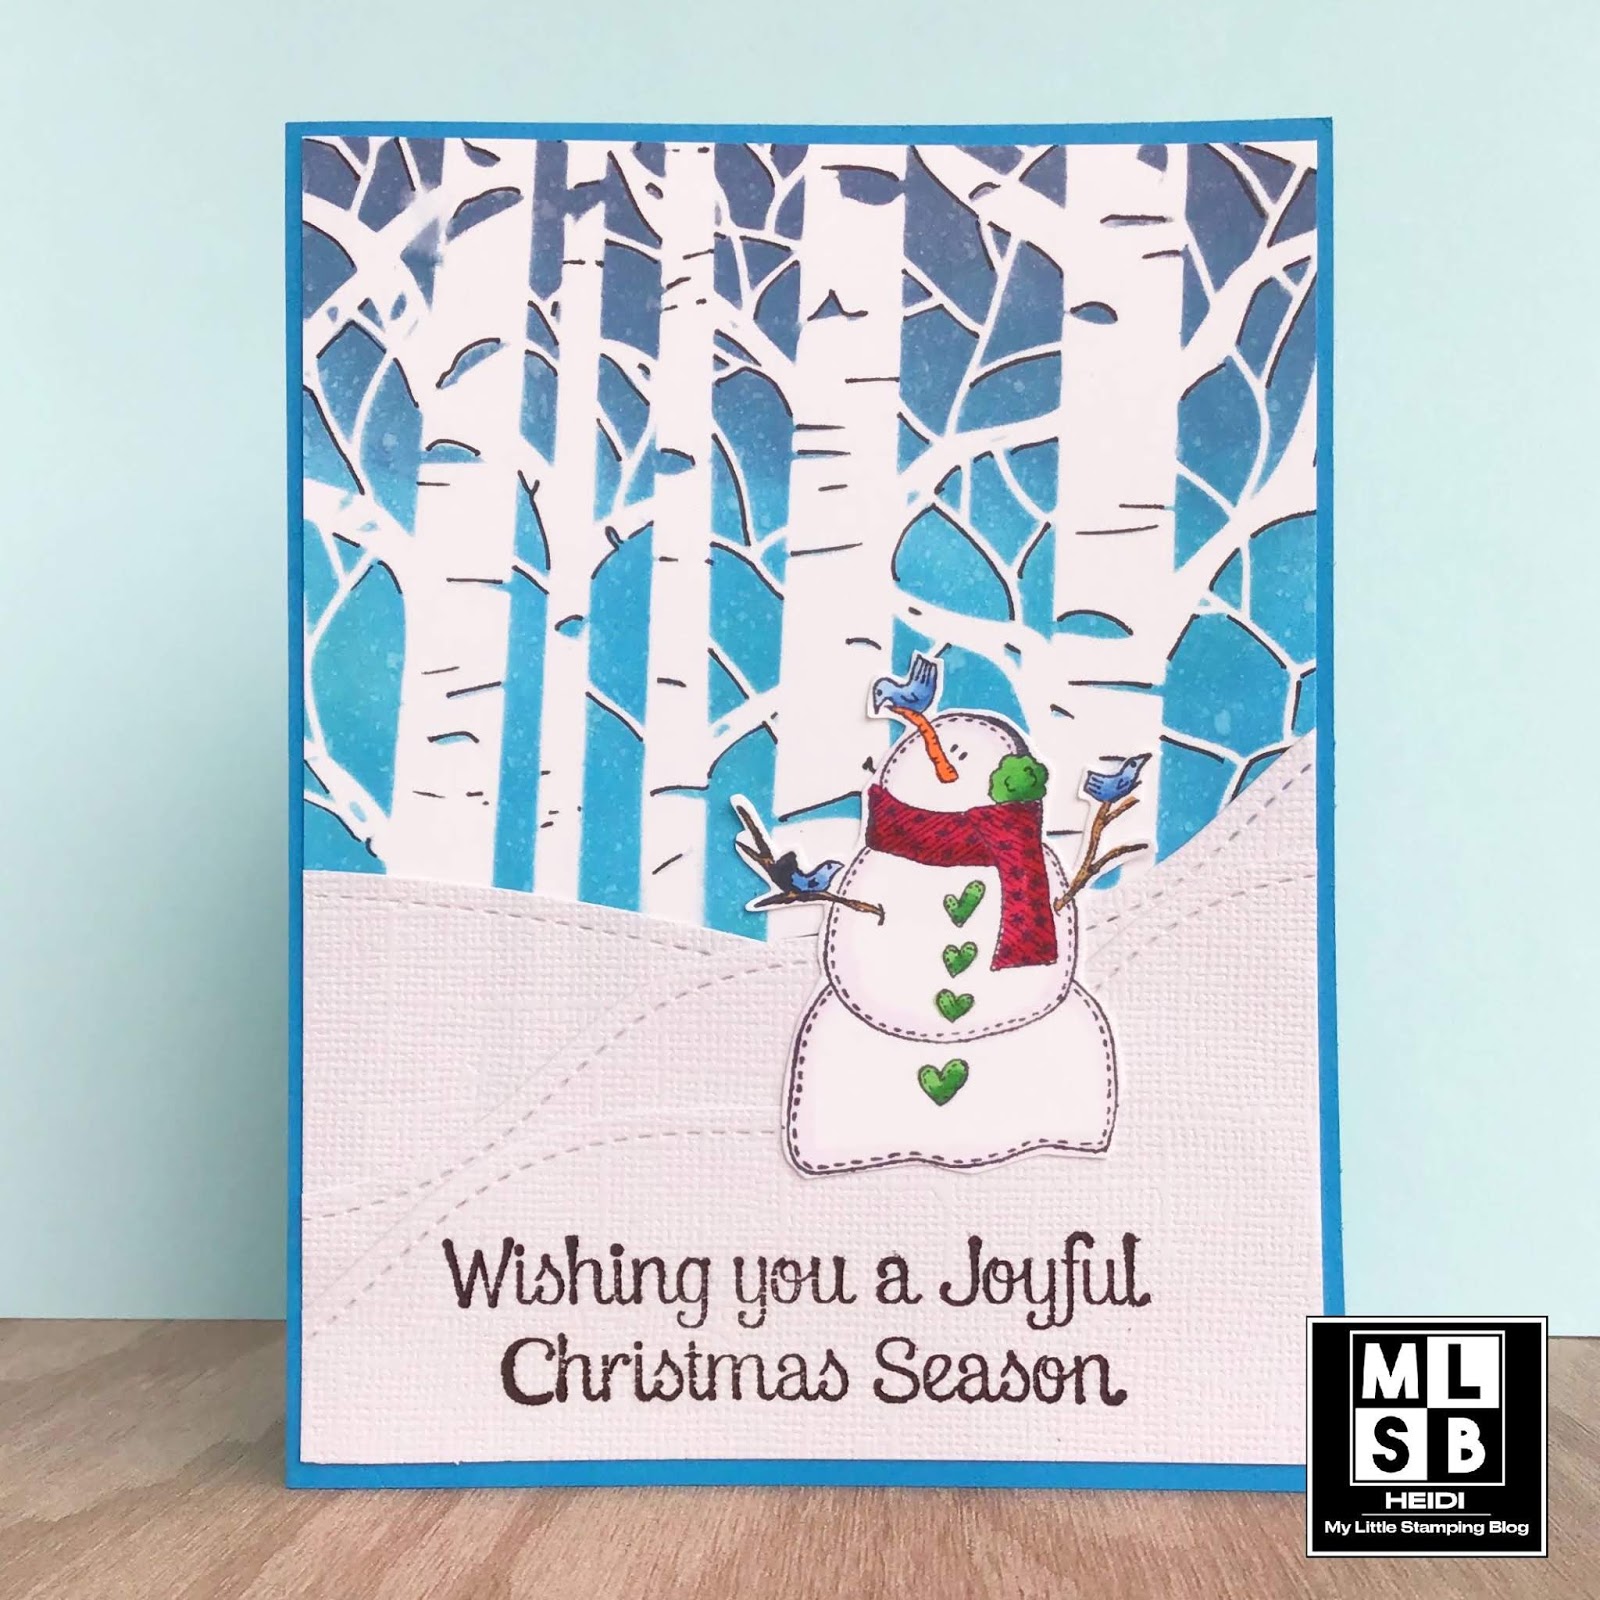
Snowman Christmas card with Stenciled Background

Hello! I know it is Valentine’s Day but I am here with a new Christmas card for 2020.  I have used the same stenciling technique to add depth as this post, but with a different style stencil.


The stencil was inked with a few colors of blue Distress Oxide inks (I think it was Faded Jeans and Peacock Feathers) and with the stencil still in place, I spritzed it with water to get the look of snowfall. Use a fine tip black marker, I added depth and shadows throughout the entire background.

I created snow hills with Frantic Stamper dies and textured white cardstock and added this sweet country snowman from Deep Red stamp to finish my scene.  The sentiment is from a very old Hero Arts set. 

Thanks for stopping by!

2020 Christmas Card Goal to Date: 10
2020 Christmas Cards finished: 6

Wednesday, February 12, 2020

Two for One - Handmade Valentine Cards

Hello! I would love to share two Valentine Cards I made using stamps that are not created for Valentines. 


First, I stamped the background in light pink.  I die cut out a heart in the center, and saved the heart for my second card.  I stamped, simply colored and fussy cut the snowdrops.  Here, I glued the base of the flowers down, but used dimensional foam tape to pop up the blooms over an embossed white background.  The entire panel was placed a light green card base, and I added a die cut sentiment.  


I could not just throw out the pretty heart, so I stamped the word LOVE on it, put three gems under and popped this up on an embossed background.  I think the simple detail of matting in black, and adding some sparkly silver ribbon, really makes this card pop.

Supplies: I Brake for Stamps  Huge Floral Background, snowdrop from Bubble Wrap, Lattice and Flower Sheet,  Love sentiment from Wedding Sheet. Gina K Innocent Pink ink, Darice and Cuttlebug embossing folders, generic Heart Dies, Close to My Heart gems and thread.
Save 10% on your entire order at I Brake for Stamps using my code SAVE10HEIDI.


I have already sent these cards out as Valentines, but I think they could also make a nice wedding card, or birthday card, if you just changed the color of the background stamp to suit your needs.

I hope that YOU have a wonderful Valentine’s Day!  Thanks for visiting as I love to share my love of stamping with you!

Monday, February 10, 2020

Mixed Media Corrugated Cardboard Stamped Art

Hello everyone!  One of the other challenges in my online stamping group was do to a technique with corrugated cardboard, acrylic paint and stamping.  You can see the basic technique in this YouTube video.


I decided to throw the kitchen sink at this, and made a piece of Mixed Media home decor.  I know this is not what I usually post, but I just adore this style.  And I get to use a bunch of stuff in my stash!

Here is a photo of this background (and a spare) before I did the stamping on it.  If you try this watch out!  You might just get addicted! (Also, a tip, using a brayer to apply the paint instead of a brush is faster and more even.)


Thanks for visiting!

Wednesday, January 29, 2020

Who Loves You? - Owl Valentine

Hello all! I wanted to sneak in a post today to enter some challenges.  I had half of an idea on how to use this owl (which is actually from a Halloween set) with some other products in my stash to make a Valentine.  The rest of the idea came to me this morning.  


I die cut a heart in my pink cardstock and then embossed it with a woodgrain folder. I used a tan inkpad direct-to-paper to bring out the embossing.  I used some foiled pattered paper behind this, and then nestled my owl right in there.  


The inside of the card has a sentiment that I stamped out with an alphabet set.  

I think I know just the little girl to send this to.  

I’d love to enter Art Impressions Shades of Pink Challenge, ModSquad Challenge Animal Stamps, and SimonSaysStamp’s Wednesday Challenge - Anything Goes

Supplies:  Art Impressions SC0735 Fright Night stamp and die set, Hero Arts Log Letters and Numbers alphabet stamp set,  Sizzix Thinlets Sentiment words dies, Firefly Hearts die set, Darice Woodgrain Embossing folder, Hero Arts Soft Sand ink, Gina K Dark Chocolate ink

January Carnations - Flower of the Month Card

Hello!  The Carnation is the Birth Flower for January and I always like to make a card for the flower-of-the-month, if I can.  I usually have used this stamp to color in, and I just sortof decide what color I want, but this time I wanted to use the stamp as a background.


I simply stamped the Jumbo - January Carnation in Gina K Wild Lilac ink, onto lavender  cardstock and die cut the panel.

I then cut out a sentiment in white cardstock, and used the same purple stamping ink to color the die cut.  I layered this over a sentiment cut from glitter cardstock, and voila, my card is finished. 


This stamp does come in a smaller version, as to all in the Birth Flowers series.  These are probably my favorite stamps in the entire I Brake for Stamps store.  (As always, save 10% on your entire order using my code SAVE10HEIDI)


I’d love to participate in WordArtWednesday’s Anything Goes challenge.

Thank you for visiting today! Have a wonderful day!


Wednesday, January 22, 2020

1920’s Fashion Valentine

Hello!  I am continuing to work on Valentines! One of the nicest things about making your own cards is that you can personalize each one.  This one is made with a teenage girl in mind — one who doesn’t care for hearts. 


Supplies: I Brake for Stamps 1920’s Fashion Ladies stamp set, Old and New stamp set, Versafine and Memento black inks, Gina Marie Loopy Rectangle dies, Spectrum Noir alcohol markers
Save 10% on your order at the I Brake for Stamps store using my code SAVE10HEIDI.

My background is the salted watercolor technique.  To get this texture, lay down a wash of watercolor paint on watercolor paper and, while it is still wet, throw some salt down on it.  After it dries, rub off the salt and it is ready to go. 

I added a few die cut butterflies as my embellishment.  I also added some glitter pen to the dress details and the little butterflies, but it didn’t show up in the photo.  I am happy with how this card turned out!

I’d love to enter Word Art Wednesday’s Anything Goes challenge.

Do you personalize your cards for each recipient?  Let me know in the comments.

Thanks for visiting today!

Sunday, January 5, 2020

Christmas Cards for 2020 Already??

Hello!  I hope you are enjoying your weekend.

This past year, I made more Christmas cards in November and December than in past years.  It was a bit overwhelming, so this year, I hope to get many more Christmas cards done throughout the year.  If I did ~5 a month, I would be comfortably ready to send them out after Thanksgiving this year.

I won this stamp recently, so it was the perfect choice for my first Christmas card of 2020!


I simply colored the image (House Mouse Sharing a Sip) in with alcohol markers and added flocking to the hats!  I love white flocking on winter hats!


I would love to enter House Mouse & Friends Challenge - Anything Goes/Optional Christmas, Cute Card Thursday - Anything Goes, SimonSaysStamp’s Wednesday Challenge - Something New, and WordArtWednesday’s Challenge - Anything Goes.

Thank you for your visit today! 

Tuesday, December 17, 2019

Last Minute Card set - One Sheet Wonder

Last weekend, I quickly realized that I didn’t have enough Christmas cards.  I summoned the One-Sheet Wonder to help make my cards.  And as always, I change the layouts as I please, and jazz them up with different themed stamps so they don’t all look the same.

My cut guide came from this blog.  This double sided paper with two smaller prints worked really well!


Stamps:  Penny Black Jolly Friends, Crafty Secrets Vintage Christmas, Close to My Heart ‘Tis the Season, Recollections Christmas Noel, Inkadinkado unnamed set, Tim Holtz Holiday Magic, W Plus9 Pretty Patches Trees, Versafine and Memento Black inks. Paper: Stampin Up

Thanks for visiting today!

Saturday, November 2, 2019

Pumpkin Spice Coffee Card

Hello and Happy Saturday!  This card has been in my brain for a few weeks and this morning I finally had a chance to make it a reality.  


I used several different stamp companies to get this design.  The coffee cup was stamped on a Distress Oxide Antique Linen background.  I then stamped a tiny pumpkin over top and colored it.  The Pumpkin was stamped with orange ink on some yellow cardstock and then I added the sentiment over top.  

I had some scraps of gold and green cardstock in my box, so I die cut some leaves from it and then arranged it all over my stamped woodgrain background.  All the green cardstock was sponged with some gold ink.

I am really happy with this card and I hope the photo shows the pretty gold details. 

Supplies: Just for Fun Stamptangle pumpkin and coffee cup, Hero Arts Woodgrain Background Stamp, Penny Black Spice of Life stamp set, Inkadinkado Creepy Lane stamp set, Versafine Onyx Black ink, Gina K Dark Chocolate and Tangerine inks, Spellbinders Leaves dies, Sizzix Embossing folder, Brilliance Galaxy Gold ink. 

I would love to enter The Coffee Lover’s Blog Hop, SimonSaysStamp’s Wednesday Challenge Anything Goes, Word Art Wednesday Anything Goes and Dies R Us Trees and Leaves Challenges.


Thank you for visiting today!  If you are new, I sure hope you will leave a comment so I know you were here.  And please consider subscribing!  I always do my best to visit and see what you are making too.  Have a great weekend!


Tuesday, October 29, 2019

Pinned It? Try It! Week 8: One-Sheet Wonder

Hello and Happy Tuesday!  I have missed the timing for some of my Pinned It? Try It! Series, but since it is a self-imposed challenge, I feel liberated in doing it on which day I can!

Lucky for me, in my online cardmaking group, one of the challenges was to use a particular 6x6 One Sheet Wonder layout.  This was one I have already pinned. This makes 4 cards, although for the challenge we only had to complete 3.  The basic layouts were easy, but figuring out the focal points took quite a while. I was happy to bring out some stamp sets I hadn’t used in a while.

My one sheet is the sweet brown foliage paper.  It is from an older Love Nicole 6x6 paper pad that I got a AC Moore a while back and really haven’t used as much as I should.  

I also added accents of this very pretty champagne/gold metallic cardstock that I got on clearance at Staples.  It really doesn’t show how pretty it is in the photos.  


Supplies: Gina K Designs Painted Autumn and Birthday Blessings Stamp/Die sets, Close to My Heart Just Treats stamp set, Gina Marie Wonky Stitched Ovals and Stitched tag dies, Love Nicole Autumn Splendor 6x6 paper pad, EK Success Postage edge punch, Astrobrights Gold Pearl Linen cardstock, other items from my stash.

I’d love to enter these in the Cupcake Inspirations Fall Challenge and the ModSquad’s Sentiment says it All challenge.

.

Thank you for stopping in today!  How have you been spending your crafty time lately?  

Sunday, September 29, 2019

Pinned It? Try It! Week 6: Circle Snippets

Welcome back to my 6th episode of Pinned It? Try It!  I have been perusing card ideas I have pinned long ago, and actually trying the ideas!  

This week, I am focusing on this Pin that was in my Sketch Board.  The original website was Echo Park’s Flickr account and the card was designed by Wendy McKee.  As far as I can tell, Wendy is no longer papercrafting or blogging.  


I really liked this pin for the creative use of small scraps of paper.  I do not use my punches and dies enough, so I knew that this would be a good challenge for me. 

While I loved the wonderful summery colors in the inspiration pin, I wanted to go with a more fall theme.  The papers are all either kraft cardstock, or scraps of a VERY OLD 6x6 paper pad called Darling Deer.  I love this paper pad, but need to use it up.  My banner is a stamp, and I had to add a cute bird stamp as well.  I did distress most of the paper and die edges with Tea Dye distress ink. 

I also was inspired to use my corner rounder, which I haven’t used much lately. 


Supplies:  JFF Fashion Warbler stamp, Lawn Fawn Bannerific Stamp set, I Brake for Stamps Sheet 138B (sentiment), My Mind’s Eye Darling Deer 6x6 paper pad, Gina Marie X Stitched Circle dies, EK Success Circle Punch, Spellbinders leaf dies, other items from my stash.

I would love to enter Pixies Snippets Playground Anything Goes challenge, and WordArtWednesday’s Anything Goes challenge.

Thanks for visiting!