Showing posts with label distress. Show all posts

Thursday, June 11, 2020

Polar Pals Christmas Cards

I am really far behind in Christmas card goals this year.  Now that it is summer, I think I will have more time to catch up.  I will start catching up with these two cards.


The first background was made with heat embossing on watercolor paper. I then used a square acrylic block to apply distress inks (spritzed with water) to specific areas.  I ended up liking the controlled, but not totally controlled look of this!

The second background was a technique I tried with stencil resist.  It didn’t work, but I liked the background anyhow.

Thanks for visiting!

Christmas Card Goal to Date: 30
Christmas Cards completed to Date: 18

Wednesday, December 25, 2019

Christmas Wishes!

I want to wish all my readers a very Merry Christmas and a safe and happy holiday season!
 Thank you for visiting my blog today, and all throughout the year.  I appreciate all those who subscribe and especially when you have time to leave a comment.  I do enjoy papercrafting and stamping so much, and it really is a blessing to have the support and encouragement of an online community. Thank you!


My clean and simple card uses a lovely image from I Brake for Stamps Small Christmas sheet and the sentiment is from Christmas Tree Collage Quarter Sheet.  As always, you can save 10% off your order at I Brake for Stamsp using my code SAVE10HEIDI.

I masked off my card front with tape, and blended three colors of Distress Oxide ink: Salty Ocean, Faded Jeans and Seedless Preserves.  I spritzed this with water to get a snowy look.  When it dried, I stamped the scene on top using Distress Oxide Black Soot.  

Thank you for visiting!


Wednesday, October 30, 2019

Halloween Card with Pop-up feature inside

Hello and I hope you are well. Today I am going to share my last Halloween cards of the year.  These both have similar card fronts, but for the blue card, I decided to use the W-Fold on the inside so I could add a lot more images!  (I shared a tutorial on how to do this HERE.)


Stampendous, Just for Fun and Hero Arts stamps.

I would love to enter this in the SimonSaysStamp Wednesday Anything Goes challenge and Lost Coast Portal To Creativity’s Halloween Challenge.

I am all ready with piles of candy to give out tomorrow night.  Unfortunately, we are supposed to get a lot of rain, so I hope I don’t have a lot leftover.  Handing out candy is something I look forward to every year.  We typically get LOTS of trick-or-treaters, as we have a very safe road, and I have found that most kids are very polite and trying their best, for their ages.  That being said, the tiny ones will probably always be my favorites!

Have a wonderful day!


Monday, October 28, 2019

Spider Halloween Card

Hello everyone! Hope you had a good weekend!  One of my kids has a fever today, so we won’t be able to enjoy the beautiful sunshine as much as we hoped.  

Here is a quick share of another Halloween cards I made.  The spiders are stickers I purchased last year. Now, I have just one left.


Thanks for visiting! Have a good day!

Friday, October 25, 2019

Not too scary Halloween Cards - Distress Oxides

Hello everyone!  Most of the Halloween cards that I am going to share in the next few days were made using a combo of my time spent at my craft group, plus time spent at home.  I have found that traveling with my supplies is best used by making “pieces-parts” of cards.  

So, one week at craft group, I brought my Distress and Distress Oxide inks, and made a bunch of backgrounds.  I added ink with direct-to-paper techniques, and then added some water to blend them, and sometimes added salt to get texture.  

Another week, I brought stamp sets and just stamped out a bunch of images, colored them, and fussy cut them out.  I actually have a bunch of Christmas images done that I need to make into cards, too.  

Then I take them home, and I find it easier to put cards together there, where I have all my craft supplies at my fingertips.  Then I am able to make a variety of cards.

The first Halloween card, I stamped a creepy tree in the background, added black ink around the edge and then just added my cute costumed kids.  I really like this combo of creepy images and cute.  I don’t like too scary of cards for Halloween.


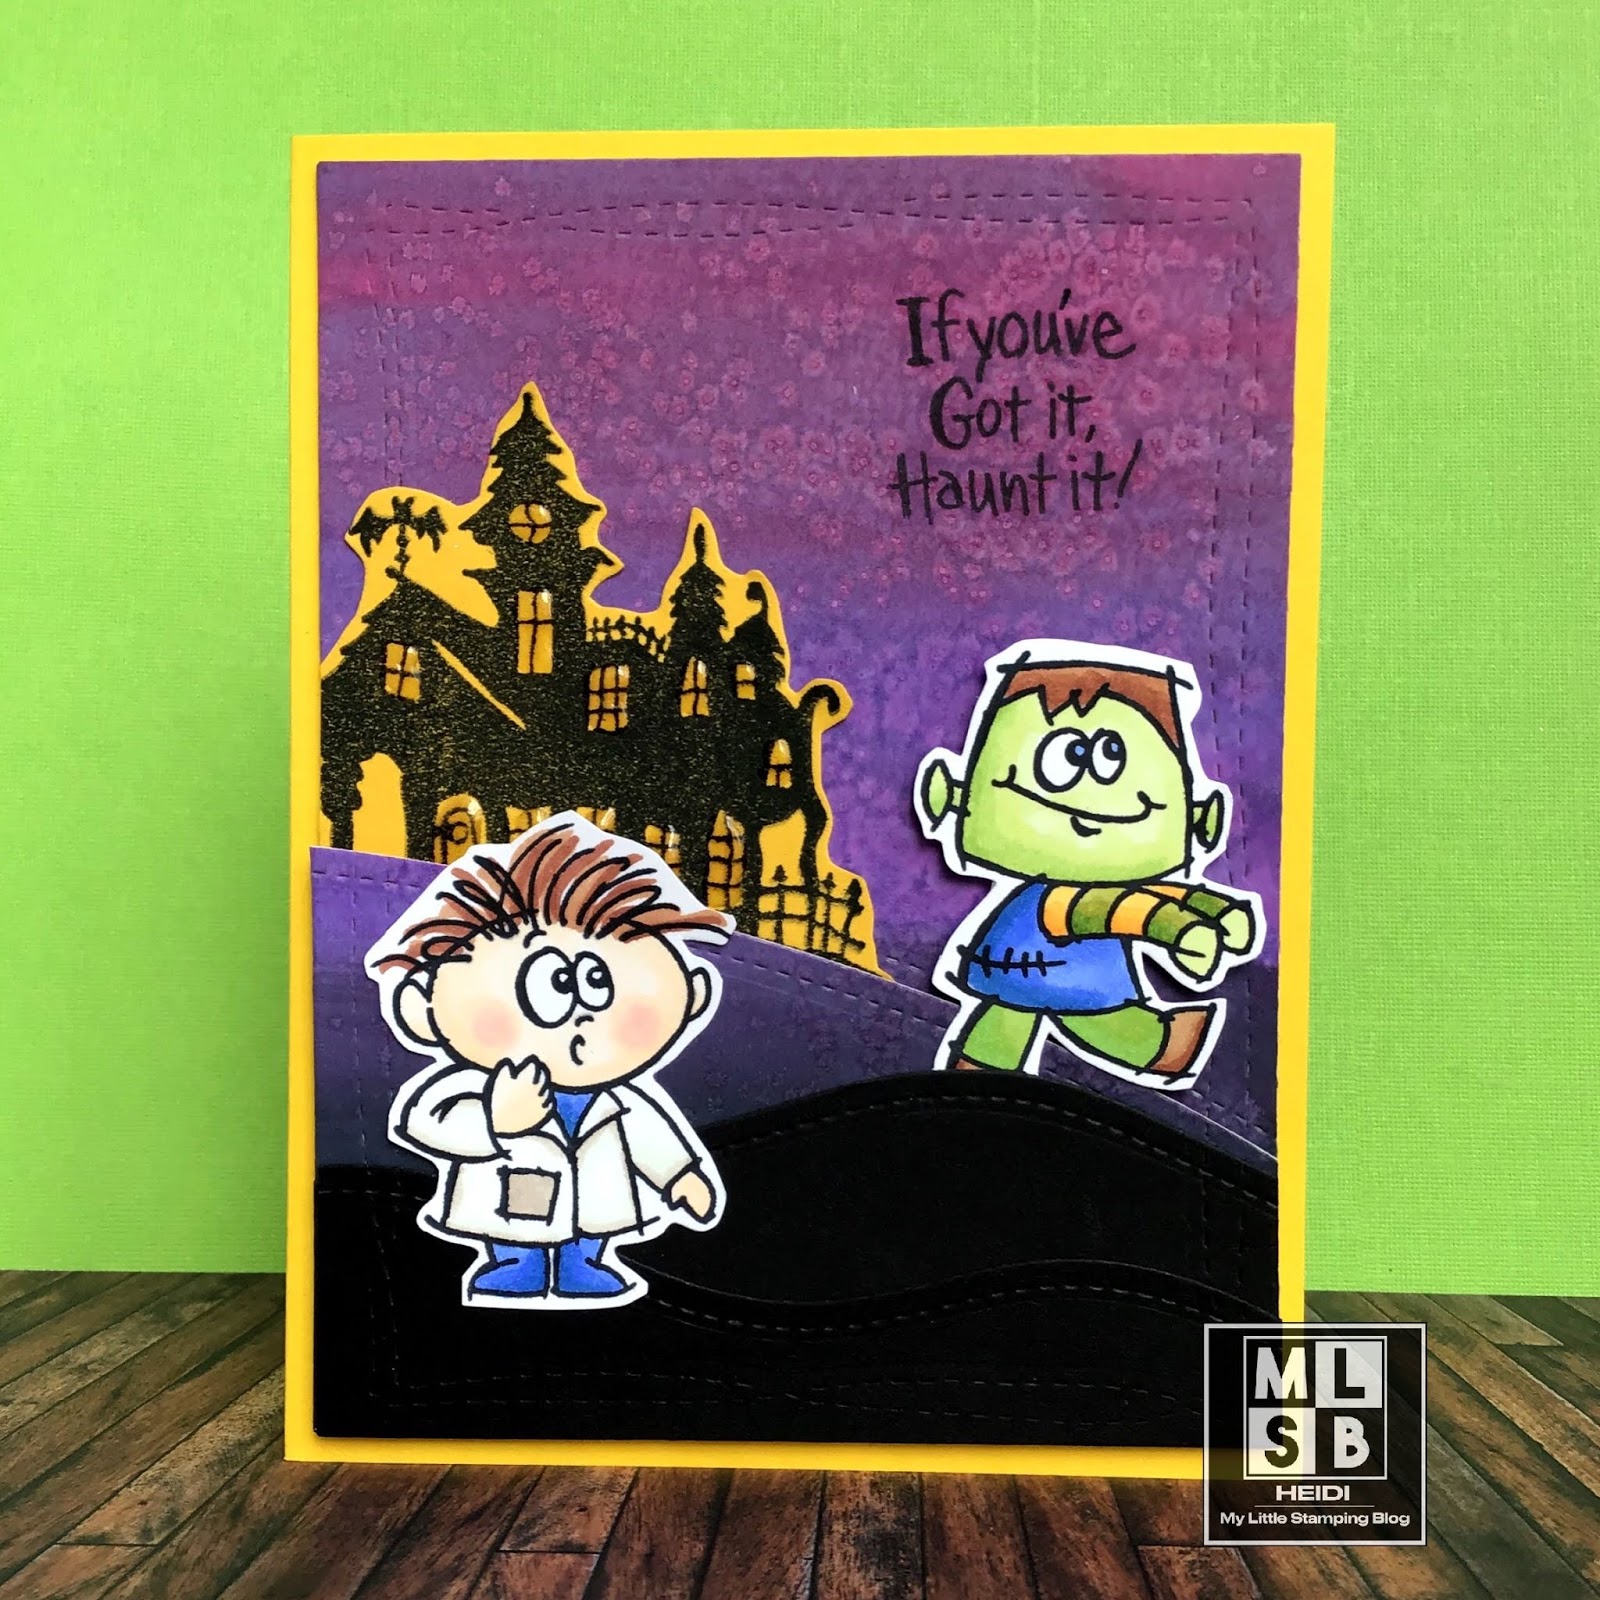
The second card, I went with a lot more detail.  I not only used my salt-treated oxide background, but I die cut and popped up some hills, stamped a haunted house on yellow and added glossy accents to the window.  I really love how this one turned out, and I hope the photo does it justice!


Supplies: Stampendous Bring to Life stamps set, Hero Arts CL057 October set, Just for Fun Rubber Stamps Haunted House and Tree, Distress Oxide ink and Versafine ink in black, Distress Oxide (card 1) Twisted Citron, Lucky Clover, Salty Ocean, (card 2) Seedless Preserves, Wilted Violet, Black soot,  Avery Elle Wonky Stitched Rectangles dies, Frantic Stamper stitched borders dies, other items from my stash.

I would love to enter the SimonSaysStamp’s Monday Challenge Spooky, and Lost Coast Portal to Creativity’s Halloween Challenge.

THANK YOU for your visit today!  Hope to see you again soon!

Friday, August 30, 2019

Pinned It? Try it! Week 3: Make Your Own Multicolor Inkpad

Hello everyone! I am back again with another episode of Pinned It? Try It!  This time, I have a pin that is probably 8 years old that was a photo on Flickr, but has since been deleted.  This is where Pinterest really shines, I think, in preserving that for us.

The Pin is HERE.  You will want to take a look at the photo.  The text on the Pin says, “Inks added to acrylic block, spritz with water, lay stamp over it and then stamp onto watercolor paper.”  Basically, it is making your own multicolor stamp pad.  

I bet I pinned this because I really like that stamp, which I recall is a Hero Arts stamp. I don’t have it, but I do have another in the same style and era.  I naturally grabbed that stamp to try this technique.  It is Hero Arts Silhouette Bells.

So, I followed the directions, as written... I decided to use Distress Inks, as I figured any dye ink ought to work (and probably many other inks, too.) Not so good results!!!


However, my experience told me to first apply Versamark clear embossing ink to the stamp, and then the homemade inkpad.  Much better!


Here is the card I made using this image. I finished it off with an embossing folder and a sentiment from Close to My Heart’s Wordfetti stamp set.  


This is not an exact technique and the results do vary.  The nice thing about watercolor paper is that you can just turn the paper over and use the other side, no problem.  In addition, for this next card, I got a good result for much of it, and then a blank spot on one part of the image, that I just cut off.  It helped stretch my stamp, too!


Of course, you don’t have to use an acrylic block for your surface, your craft mat might work just as well.  And you can probably use watercolor markers, distress Oxide inks, etc.  I think many people have expanded on this technique over the years.  That is the funny thing about stamping techniques, as the first person to post it on the internet might have learned it at a stamping party first, so we often don’t know who thought them up in the first place.  ANYHOW... I’m going on and on today!

Thank you for visiting!!
If you want to catch up on previous episodes, find all my Pinned It? Try It posts HERE.

I would love to enter this in A Blog Named Hero’s Stretch Your Stamps challenge, and CASology’s Water Challenge.


Thursday, February 7, 2019

Distress Oxides Smooshing over Gesso Technique

Hello everyone!  I hope you are doing well.  

I have been working on the administrative side of my blog.  I continue to investigate commenting issues, and I think I have a fix as I have been able to comment on more blogger blogs today.  Yay!

Also, you might know that Google+ is closing up shop, and so many of us that use Blogger have widgets and things that are connected to Google+.  So I went ahead and removed those.  

The rub is that people who have been following me via Google+ and won’t find me anymore.  However, I have gone through and tried to find all those blogs that I followed on Google+ and added them to my regular reader.  I now follow about 120 blogs!  


Anyhow, I have shared this tip before, but I have an easy hack for doing the smooshing technique with Distress Oxide inks.  The trick to getting lovely layering (I think) is to first coat your cardstock with gesso and letting it dry.  Then do the smooshing as you usually do, drying in between colors.  This background was done using Wilted Violet, Seedless Preserves and Salty Ocean Distress oxide inks.  

I then stamped and colored my snowman.  I added glitter pen in certain spots.  I cut out the snowman just on top, creating a hill below.  


Supplies: Power Poppy Snow Kissed Stamp set, Memento and Versafine Black inks, Distress Oxide Wilted Violet, Seedless Preserves, Salty ocean inks, Sakura Stardust gel pen, Spectrum Noir alcohol markers

Thanks for visiting today!  If you aren’t already, consider becoming a follower!


Saturday, July 14, 2018

Tropical with Distress Oxide inks

Hello!  Thanks for stopping by today.  I wanted to share a card I made using a technique I learned from my friend April.  Check out her blog here.  

For the background, I stamped in three Distress Oxide colors.  Each stamping, you will ink up your stamp, spritz it with water before stamping. You will move your stamp slightly with each stamping.  I used my stamping platform to make this a little easier, but it certainly isn’t needed.  First was Antique Linen, then Twisted Citron, and finally my darkest color was last, that was Peeled Paint.  It’s a fun technique and can be done with lots of different background stamps.  


The hibiscus is a stamp layering set.  I also used all Distress Oxides for this, spritzing the stamp with water before stamping.  So pretty and a great finish for the card without covering up too much of my background.  Clear Nuvo drops were added for decoration.

Supplies:  Just for Fun Rubber stamps Bamboo background stamp, Hero Arts Layering Hibiscus stamp and dies, Distress Oxide inks (pink flower) Worn Lipstick, Picked Raspberry, Candied Apple, (orange flower) Wild Honey, Abandoned Coral, Candied Apple, Black Soot for flower centers, Peeled Paint, Twisted Citron and Antique Linen, scrap cardstock, Gina K Sentiment with Versafine black ink, Clear Nuvo Drops.

Thanks for stopping by!  
I always appreciate your visits and comments! Please consider following my blog using the Blogger tool on the side bar, or on facebook or pinterest, too.

Wednesday, May 30, 2018

Thinking Happy Thoughts - Rain Background

Hello!  A bit of a quick share today.  I created this rainy background using a technique with Distress Oxides.  I saw something similar on Karen’s blog.  


You smoosh the Distress Oxides on your craft sheet and wet them with a spritz or two of water.  Then use the edge of a piece of acetate packaging (or a small strip of acetate would work too) pick up the inky water and apply to your cardstock.  It controls the application a little so you can keep your card a little more clean and simple.

Supplies:  Just for Fun Rubber Stamps Girl with Umbrella Silhouette, Sentiment sheet 1, Distress Oxide Black Soot, Faded Jeans and Broken China, Versafine Black ink, Avery Elle Wonky Stitched Rectangles dies

Thanks for stopping by today!

You can find me on facebook or pinterest, too.

Friday, March 2, 2018

Peacock Card with Distress Oxide Inks

Hello!  TGIF!  It is so rainy here, but I am looking forward to the break of the weekend.  I would like to share a card I made for a mix of challenges, including a brand new one!  Scroll down for more information.


I used my stamp positioner to first stamp the peacock image in the three tones of blue Distress Oxide ink.  Then, I inked just the edges of the stamp in black Distress Oxide (which, of course, is actually grey, given that it oxidizes a little) and stamped again.  I really loved the rich look of this.  I added Nuvo Glitter drops to the tail.


Supplies: Hero Arts Peacock stamp, Distress Oxide inks in Salty Ocean, Peacock Feathers, Faded Jeans and Black Soot, Just for Fun Rubber Stamps Thanks sentiment, Nuvo Crystal Drops in Clear Glitter, other items from my stash.

I was inspired by these challenges:
The Library challenge - Pride and Prejudice **brand new. I was inspired by the cover of the book
SimonSaysStamp Wednesday Challenge - Anything Goes
Word Art Wednesdays 324-325 Anything Goes


I hope you will have a wonderful day!  Thanks for visiting!

You can find me on facebook or pinterest, too.

Wednesday, January 3, 2018

Galaxy Cityscape Greeting Card

I am a little late on the Galaxy bandwagon, but it is really a fun one!  Have you tried it?

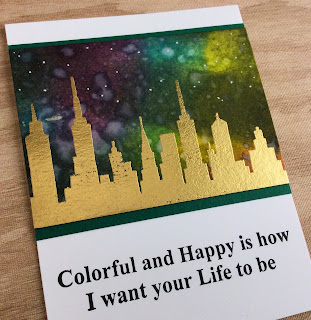
I used regular distress inks on watercolor paper and dropped water onto it.  Then, when it dried, I used a white gel pen to add some stars.


Of course, over top, I heat embossed the Cityscape in gold.  


Supplies: Just for Fun Rubber Stamps Skyline Silhouette, Colorful and Happy sentiment, Distress Inks Dusty Concord, Mustard, Black Soot, Peacock Feathers, Broken China, Picked Raspberry, Watercolor paper, Versafine Black ink, Versamark embossing ink, Recollections Detail Gold Embossing Powder.


Thanks for stopping in today!  I appreciate your visit!

Tuesday, August 1, 2017

August is Hot, Hot, Hot!

I have a fun summery card to share and an announcement about Just for Fun's August Challenge.


The theme is Hot, Hot, Hot! and you can see that this can be interpreted in many ways.  I really hope you will play along.  You do not need to use Just for Fun stamps, but you could win a gift certificate for some!


I made a summery, beach card. I stamped the palm tree with three colors of Distress Oxide ink onto the back side of a piece of cardstock that I had embossed.  I learned this technique from fellow JFF Design Team member, Stampwilly.  The background was stamped twice, once with light blue Distress ink and once with a medium blue.  

Supplies: Just for Fun Rubber stamps Beach Unmounted sheet, Striped background stamp, Sentiment Sheet 1, Distress Oxide Cracked Pistachio, Broken China, Faded Jeans, Distress ink (regular) Tumbled Glass, Broken China, cardstock from my stash.

Thanks for visiting my blog today! 

Wednesday, July 12, 2017

Card Drive - One Layer Distress Oxide Floral

Hello stamping friends!  Today I am asking for your help with a card drive organized by my blogging friend, Carole from My Carolina Home.  You will want to visit her blog to see her amazing quilting projects, tablescapes and cards.  She has a need for encouragement cards AND monetary sponsors to complete care packages for women in a domestic abuse shelter.  

Here is the link to her blog post with all the details.  There will be a really great prize for one lucky donor and donations are needed by August 1st.

Here is a card I created and will send in.

(Click to enlarge photos.)

It is a one-layer card on a light blue cardstock with a tiny bit of speckles.  I inked up my stamp with Distress Oxide inks, adding a touch of darker pink and green marker to portions.  Then I sprayed the stamp with water and stamped onto my blue card base.  I love the variation of color where the ink oxidized and then other areas where you can see the marker.  Finally, I added Nuvo drops for embellishment.


I used an uplifting sentiment and then matted that with navy cardstock.  I will write a little note inside.  Carole asked that we not write anything religious because we won't know who our recipient is.  When I have trouble figuring out the right words to write inside, I often do a little internet search. There are lots of ideas out there that are simple or complex, depending on what you are going for.

I do hope you will consider sending a card or supporting this drive monetarily!  I am so glad Carole asked me to be a part of this drive, it feels good to do good.

Thanks for stopping by today!

Supplies: Inkadinkado Flower Blossom by Brenda Walton, Gina K Designs Inspiration Mosaic stamp set (sentiment), Distress Oxide ink Worn Lipstick and Peeled Paint, Tombow markers, Versafine Onyx Black ink, cardstock from my stash, Nuvo Crystal drops

I would love to enter this challenge:
Tuesday Throwdown - One Layer

Saturday, July 1, 2017

Wedding Card Challenge

The challenge theme for the Just for Fun Rubber Stamps June challenge is... 


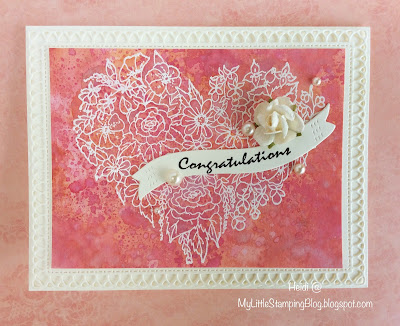
What a perfect time to stock up on these special cards.  I made two with heat embossing over some Distress Oxide backgrounds I had made.  The first card was just pink and orange Distress Oxide layered in the background and then I used ivory cardstock and pearls for the accents.  

(Click on photo to enlarge.)

The second background was made with pink and orange Distress Oxides and then added Pickled Raspberry Distress ink because I really wanted something brighter. (I am really hoping that Ranger is going to add this color when they expand the line later this summer.  I have a whole wish list including black and blueprint sketch.). I used white for this card base and an older vellum butterfly for my embellishment.


There is a random prize draw for JFF's monthly challenge (and you should know that while you are encouraged to use JFF stamps if you have them, it is certainly not a requirement) so I do hope you will play along!

Supplies: Just for Fun Rubber stamps Flora and Fauna sheet, Sentiment sheet 1, Versamark ink, Recollections White detail embossing powder, Distress Oxide inks Orange Marmalade, Worn Lipstick, Distress Ink Pickled Raspberry, Gina Marie Loopy Rectangle die set, Avery Elle Wonky Stitched rectangle dies (banner)

Thanks for stopping by!

Sunday, June 11, 2017

Distress Oxide with Sparkle: Under the Sea

If you are having any trouble getting results you like with your Distress Oxide backgrounds, I humbly suggest adding some sparkle.


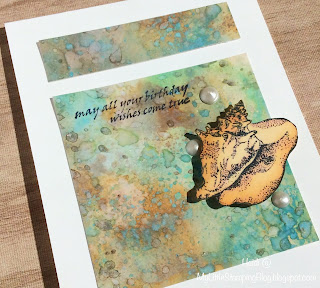
The easiest way I have found to do this is to use Perfect Pearls.  This background was made starting with the same technique Tim Holtz has shown in many videos.  Smush your ink onto your surface, spritz with water and drag the paper through it.  Dry in between and repeat.  This is my twist on the technique, when you have your color down, get a bit of perfect pearls powder and add some water.  Use a brush and flick it all over your background.  At this point, I hope you will see your matte background come alive, like they did for me.


For this background I used two colors of gold Perfect pearls.  I love how it looks at different angles.  I used a lovely shell stamp and colored it with alcohol markers and used Pearl Nuvo Drops for embellishment.


Supplies: Just for Fun Rubber Stamps Beach Unmounted stamp set, Sentiment sheet 1, Memento black ink, Archival Black ink, Distress Oxide ink Cracked Pistacio, Broken China and Vintage Photo, Perfect Pearls Antique and Perfect Golds, Spectrum Noir alcohol markers, Nuvo Drops Pearl

I would love to play along with this challenge:
Freshly Made Sketches #291

Thanks so much for coming by!  I hope you will have time to leave a comment or follow my blog.  Have a great day!

Thursday, April 20, 2017

Adding Sparkle to Distress Oxides - Clean and Simple Christmas Card

Hello cardmaking friends!  I am going to be very interested in your reaction to my card today because I have received VERY mixed reactions from those who I have shown it to thus far!  Is it too artsy?  Would most people like it? I don't know, so please let me know your reaction.


I created a background with Distress Oxide inks.  I have found that sometimes, the backgrounds still need something once I am done with the ink smooshing. If you are having the same feeling about your backgrounds, I think that you should try adding sparkle.  I think the easiest way I found so far is to mix a little pool of Perfect Pearls in water, and then flick that onto your background with a paintbrush.  They really just come alive with this addition.


For this card, I added both Perfect Gold and Antique Gold.  I took photos from a couple angles because I think that helps see the depth of color and sparkle.


This card was so clean and simple, I just die cut a piece of background and stamped the sentiment.  The card base was scored a few times to balance the card front.


Supplies: Distress Oxide Cracked Pistachio, Broken China, Vintage Photo, Ranger Perfect Pearls, Spellbinders Circle dies, Our Daily Bread Designs Earth Verses stamp set, Versafine Black ink

I would love to share this project with the following challenge:
SimonSaysStamp Monday Challenge - Splash it On

Thank you for spending a few minutes of your time with me today, and a special thanks if you took time to leave a comment.  Have a great day!

Wednesday, March 22, 2017

Distress Oxide Technique - Stamping with Water

Hello and hope you are well today.  I would like to share some cards and a quick tutorial for a technique that I used with Distress Oxide inks.  I know that these inks are great for blending - I am seeing that all over the crafting world - they really do blend like a dream!  And they are also great for reacting with water, so I combined those two strengths here.


This background used Broken China, Faded Jeans and Peeled Paint Distress Oxides sponged and blended on plain white cardstock.  The tree line was stamped on the back.


If you aren't familiar with this technique, let me show you how easy it is.
(Click on the photos to enlarge.)

First, sponge the Distress Oxides on your cardstock with a heavy hand to get good coverage.


Second, ink up your stamp (solid ones work well) with Versamark ink.  (This step is optional, but I think it helps.)


Spritz the stamp with water a couple of times and stamp over your background.


The ink reacts with the water by oxidizing and turning white as well as the watermark that would happen with regular distress inks.  The result is really quite pretty and easy to do!


Here is the card I made with this background.


(If you missed it, check out my other Distress Oxide tutorial for faux bleaching.)

Supplies:  Just for Fun Rubber Stamps Flora and Fauna Unmounted Sheet, Tree Line Background stamp, Sentiment sheet 3, Distress Oxide inks, Versamark, Embossing folders by Darice and Elizabeth Crafts, Versafine Majestic Blue ink.

Thanks for stopping by!  I would love it if you left a comment so I know you were here! 

I am playing in the following challenges:
ModSquad Challenge - Plant Kindness (both cards qualify)
CASology Melt (tree card)

The Flower Challenge - Anything Goes (Floral card)

Friday, February 24, 2017

More Faux Bleaching with Distress Oxide Inks (and my Lilac experiment)

Hello and thanks for coming by!  I have a couple more cards today made with my Faux Bleaching technique tutorial for Distress Oxide inks.  If you haven't already, I would be thrilled if you checked it out.  


This card was made with Iced Spruce Distress Oxide ink (it is a greenish grey) on dark grey cardstock from Michael's.  


The fern sortof looks like it has been x-rayed.  I think it is really pretty with the light blue papers.


The second card is the Tea Dye Distress Oxide on Kraft paper from Michaels.  I do really love that color variation.  If I had used a touch more water, it would have been more white.


I have been trying to use a lot of patterned paper and even some older brads that are so pretty!

Supplies: Just for Fun Rubber Stamps Flora and Fauna Sheet, Sentiment Sheet 3, Distress Oxide Inks,   My Mind's Eye 6x6 paper pads Follow Your Heart - Be Amazing, The Sweetest Thing - Bluebell, Stella and Rose - Hattie, My Mind's eye brads, Versafine Smokey Grey ink for sentiment, Recollections Cardstock. 

I would love to participate in the following challenges:
Tuesday Throwndown - Favorite Embellishment
SimonSaysStamp Wednesday Challenge - Anything Goes!

Here are a few more combos that I tried, but have not made anything with:

Wilted Violet

Peeled Paint

This was a different one, Worn Lipstick on orange.  When I did Orange Marmalade ink it looked much more bleached on orange cardstock.

The blues, I mentioned yesterday, I did not get great results with.  Maybe I need to keep trying.  These are stil pretty, just not so bleached looking.

___________________________________________________________

As an aside, I saw a youtube video where they showed how to force branches to leaf and flower early, so I took some cuttings of my lilac bush to give it a try.  I will give you an update if it ends up doing anything! (The little faux flowers were some little school project one of the boys did for Mother's day,  I never throw stuff like that out!)


Whoa!  If you have read this far, I thank you!  I love it when you can take time to comment and will try to visit your blog too!